
The short version if you want the right lens fast
- The safest all-around pick is a constant-aperture standard zoom such as the 12-40mm F2.8 PRO II.
- If portraits are your priority, the 45mm F1.8 is still one of the best value buys in the system.
- If you want a compact everyday lens, the Panasonic 20mm F1.7 II gives you a 40mm-equivalent look in a tiny body.
- For travel, birds, and sports, the 40-150mm F4 PRO is the best balance of reach, size, and price for many buyers.
- Filters are not an afterthought on MFT; lens diameter, step-up rings, and vignetting can change the real cost of a kit.
What I look for in a Micro Four Thirds lens review
I do not read lens reviews like a spec sheet. On Micro Four Thirds, I care about how much image quality a lens gives me per gram, because the system only really works when the whole kit stays practical. I also care about field of view, autofocus behavior, and whether the lens creates extra expenses through unusual filter sizes or a weak hood design.| What I check | What good looks like | Why it matters |
|---|---|---|
| Wide-open sharpness | Clean center detail and usable edges at maximum aperture | Fast primes and zooms are usually bought for their brightest setting, not stopped down all the time |
| Corner behavior | Edges improve quickly without heavy correction | Landscape, architecture, and product work expose weak corners fast |
| Autofocus speed and noise | Confident focus with low motor noise | Important for video, events, and anything where focus hunting is visible |
| Stabilization pairing | Lens and body work well together | Some lenses rely on body IBIS, while others are better matched with optical stabilization |
| Filter and hood design | Standard threads, sensible hoods, minimal vignetting risk | This affects the real cost of CPL, ND, and protective filters |
The two biggest misunderstandings I still see are simple. First, a 25mm lens on MFT behaves like a 50mm lens in full-frame terms, so focal length choices should be read with that 2x crop in mind. Second, an f/1.8 or f/2.8 lens does not automatically look like full frame at the same aperture and framing; the smaller sensor gives you more depth of field, which can be an advantage for video, travel, and wildlife. Once that is clear, the lens families start making much more sense.
The lens families worth reviewing first
| Lens family | Example lens | What it is best at | Main tradeoff | Typical US price |
|---|---|---|---|---|
| Compact normal prime | Panasonic 20mm F1.7 II | Street, travel, casual video, everyday carry | Older design and not the fastest route to subject isolation | About $348 to $400 |
| Portrait prime | OM SYSTEM 45mm F1.8 | Portraits, headshots, low-light stills | No weather sealing and no zoom flexibility | About $280 |
| Standard zoom | OM SYSTEM 12-40mm F2.8 PRO II | Travel, events, documentary work, hybrid stills and video | Costs more than consumer zooms and has no lens IS | About $1,000 |
| Compact telephoto zoom | OM SYSTEM 40-150mm F4 PRO | Travel, nature, portrait compression, general reach | f/4 is not as forgiving in dim indoor light | About $850 |
| Ultra-wide zoom | OM SYSTEM 9-18mm F4.0-5.6 II | Landscapes, interiors, architecture, vlogging | Needs more care with filters and corners | About $690 |
| Super telephoto zoom | OM SYSTEM 50-200mm F2.8 IS PRO | Birds, sports, action, serious outdoor work | Big price jump and a much more expensive filter set | About $3,400 |
That table is the real shape of the system for me. Micro Four Thirds is not one look; it is a set of choices. If you buy the right family of lens, you get small bodies with real working reach, and the kit stays carryable enough that you actually use it. If you buy the wrong family, you end up paying full price for a convenience that never shows up in your bag.
One detail that matters a lot in the US market is how these lenses stack up in day-to-day cost. Panasonic's US shop lists the 20mm F1.7 II at $399.99, while OM SYSTEM's own pricing puts the 12-40mm F2.8 PRO II around $999.99. That is a big spread, and it explains why some MFT kits feel like value traps while others feel like a smart, efficient system. The glass you choose matters as much as the mount itself.
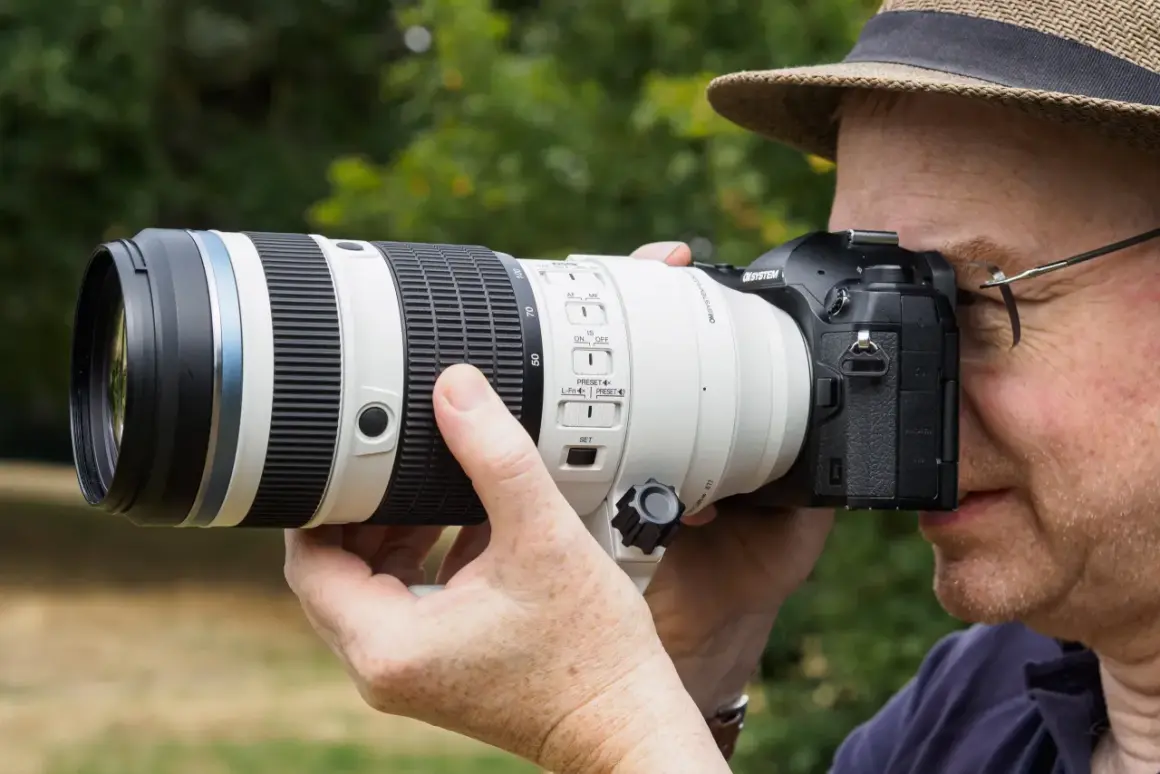
The same logic applies to premium telephoto glass. The 40-150mm F4 PRO sits in a very different place from the 50-200mm F2.8 IS PRO. The first is a sensible travel telezoom that keeps the kit compact. The second is a statement lens for people who actually need 100-400mm equivalent reach with a constant bright aperture and strong stabilization support. If you do not shoot birds, field sports, or distant action, that extra money is usually better spent elsewhere.
For me, the smartest way to read a lens review is to ask one question: what job is this glass supposed to do better than the cheaper option? If the answer is only "slightly more reach" or "slightly nicer blur," I get cautious. On Micro Four Thirds, the best lenses usually win by giving you a clearer shooting role, not by pretending to be everything at once.
Where Micro Four Thirds lenses shine and where they still compromise
Primes are where the system feels the most natural. The 20mm F1.7 II gives you a 40mm-equivalent view that is easy to use for streets, food, indoor scenes, and short-form content. The 45mm F1.8, which behaves like a 90mm lens, is the cleaner portrait choice because it gives you flattering compression without forcing you to stand too far away from your subject. At 116 g with a 37mm filter thread, it is the sort of lens I keep in a bag because I am likely to carry it, not because it looks impressive on paper.
Standard zooms are the workhorses. The 12-40mm F2.8 PRO II covers 24-80mm equivalent framing, weighs 382 g, uses 62mm filters, and is weather sealed. That combination is hard to ignore if you shoot travel, documentary work, or hybrid stills and video. The lack of lens stabilization is not a deal-breaker, but it does mean body IBIS matters more than it would on some other systems. If the camera body is weak in stabilization, I would read that lens review differently than I would on a stronger OM body.Telephotos are where Micro Four Thirds still has a real advantage. The 40-150mm F4 PRO gives you 80-300mm equivalent reach in a lens that still weighs 382 g, and that is exactly the kind of compromise the system does well. It is not trying to out-blur a full-frame 70-200mm F2.8. It is trying to give you long-lens flexibility without turning your bag into a liability. The 50-200mm F2.8 IS PRO goes further, offering 100-400mm equivalent framing, a 77mm filter thread, and a constant f/2.8 aperture, but I only recommend that level of investment when the subject matter truly demands it.
Ultra-wide lenses are the most forgiving and the most annoying at the same time. They are great for interiors, landscapes, and any visual work that needs energy and space, but they are also the easiest lenses to ruin with a bad filter choice or a thick stacked filter. Panasonic's Leica 8-18mm f/2.8-4, for example, uses a 67mm filter and weighs about 315 g, which is compact for the class but still enough to make filter planning matter. With ultra-wide lenses, I check edge behavior and filter compatibility more carefully than I do on almost any other focal length.
The honest compromise in Micro Four Thirds is subject separation. If you want the creamiest possible background blur, a smaller sensor will not magically give you full-frame rendering. But if you care about portability, deeper usable focus, and more reach per gram, the system can feel more efficient than larger formats. That tradeoff is the reason the mount still makes sense in 2026, especially for creators who move between stills, video, and travel content.
That is also why the next question is not just which lens is sharp, but which accessories are going to make that lens annoying or expensive to use.
Filters are a bigger deal on this mount than most buyers expect
On Micro Four Thirds, filters can be cheap in one lens and surprisingly expensive in the next. The 45mm F1.8 uses a 37mm thread, which keeps accessory costs low. The Panasonic 20mm F1.7 II uses a 46mm filter, still manageable. Once you move to the 12-40mm F2.8 PRO II or 40-150mm F4 PRO, the common 62mm thread becomes a good standard size. The 50-200mm F2.8 IS PRO jumps to 77mm, and that is where protective filters, CPLs, and ND glass start to cost real money.
| Filter size | Common lens examples | Practical note |
|---|---|---|
| 37mm | OM SYSTEM 45mm F1.8 | Very affordable and easy to build a small filter kit around |
| 46mm | Panasonic 20mm F1.7 II | Still cheap, but less universal than 62mm |
| 52mm | OM SYSTEM 9-18mm F4.0-5.6 II | A useful middle ground if you shoot a lot of landscapes or architecture |
| 62mm | OM SYSTEM 12-40mm F2.8 PRO II, 40-150mm F4 PRO | A strong size to standardize around because two important lenses share it |
| 67mm | Panasonic Leica 8-18mm f/2.8-4 | More expensive, but common enough that third-party options are easy to find |
| 77mm | OM SYSTEM 50-200mm F2.8 IS PRO | Great optics can be accompanied by a noticeably higher filter bill |
My practical rule is simple. If I own more than one lens, I try to build the filter kit around one thread size and use step-up rings where it makes sense. That way I do not end up buying three different CPLs or three different variable NDs just because the lenses came with different front diameters. It is one of the easiest ways to keep a Micro Four Thirds system economical.
For video shooters, a variable ND is often the most useful filter because many MFT lenses are bright and the system is popular for run-and-gun work. But I would be careful on ultra-wide lenses. Stack a thick protection filter, a variable ND, and a strong hood, and you can run into vignetting or uneven polarization faster than you expect. On a lens like the 9-18mm, I would rather use fewer, better filters than build an accessory tower.
There is also a false economy in cheap glass. A good polarizer or ND filter can last through several lens upgrades, while a bargain filter can soften the very lens you paid extra for. If the lens is a travel workhorse, I would buy a hood first and a decent filter second. That usually delivers more real-world protection than a shiny but weak filter stack.
Once the filter plan is clear, the last step is deciding which lenses actually fit the way you shoot instead of the way the product page looks.
How to build a kit without paying for lenses you will not use
If I were building a US-based Micro Four Thirds kit from scratch, I would not start with the most expensive lens. I would start with the lens that covers my most common subject distance and lighting conditions. That usually means one of four paths.
- Travel and everyday shooting - Start with the 12-40mm F2.8 PRO II. It gives you a real workhorse range, weather sealing, and a 62mm filter thread that keeps accessories manageable.
- Street and family work - Start with the 20mm F1.7 II if you want a compact 40mm-equivalent view, then add the 45mm F1.8 when you want more subject separation.
- Portraits and low light - Start with the 45mm F1.8. It is light, affordable, and strong enough optically that it does not feel like a compromise lens.
- Wildlife and sports - Start with the 40-150mm F4 PRO if you want a sane balance of price and portability, then move up to the 50-200mm F2.8 IS PRO only if you truly need faster glass and longer reach.
That order keeps the budget under control. It also keeps the kit honest. I would rather own two lenses that I use constantly than five lenses that look good in a drawer. In a system built around smaller bodies, the value comes from removing friction, not collecting options.
There is another practical reason to start this way. The best Micro Four Thirds kits usually share a visual logic. A 12-40mm standard zoom, a 45mm portrait prime, and a compact telephoto like the 40-150mm F4 PRO are easy to understand, easy to pack, and easy to adapt to real assignments. That is a much better outcome than buying a random spread of focal lengths that never quite covers your work.If the lens will be used for client work, I also care about predictability. Fast and silent autofocus, steady control rings, and weather sealing matter more when the lens is part of a paid shoot. For personal work, I am more forgiving. But even then, I still want a lens that does not fight me with awkward handling or accessory costs.
What I would buy first in 2026 if I were starting over
If I were starting fresh, I would buy the 12-40mm F2.8 PRO II first because it is the most complete answer to everyday shooting, travel, and hybrid content. It is fast enough to stay useful indoors, compact enough to carry all day, and practical enough to share a filter kit with the 40-150mm F4 PRO later on.
My second purchase would be the 45mm F1.8. It gives me a portrait-friendly 90mm-equivalent look without forcing me into expensive telephoto territory, and it is light enough that I would actually keep it in the bag.
After that, I would only buy specialty glass if I had a clear reason. If I shot architecture, I would add the 9-18mm F4.0-5.6 II. If I shot birds or field sports, I would save for the 50-200mm F2.8 IS PRO. That is the cleanest way to build a Micro Four Thirds system that still feels small, capable, and worth carrying.
The best Micro Four Thirds setup is the one that stays practical after the excitement fades. Start with the lens that solves your real problem, then add the one that expands your work in a way you can actually feel in the field.
