
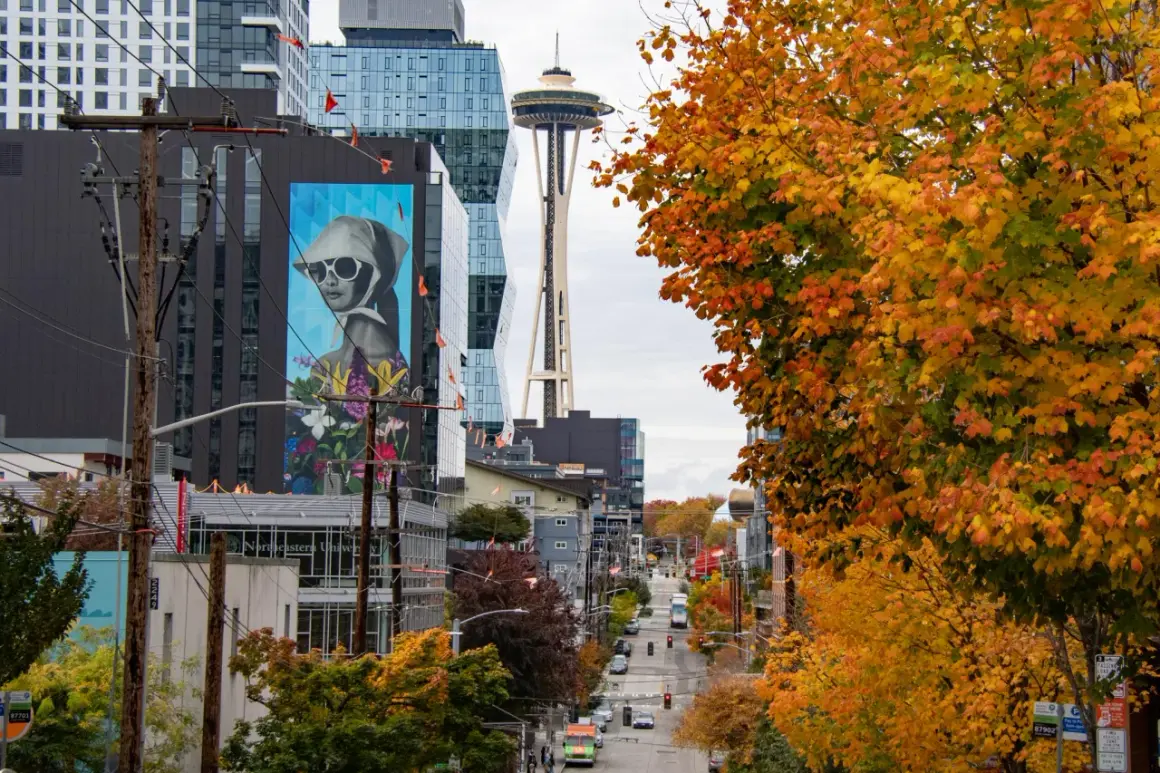
The essentials that shape the shoot
- Seattle rewards candid work because it combines water, hills, dense sidewalks, and sharply different neighborhoods within a short walk.
- Pike Place Market, the waterfront, Pioneer Square, Capitol Hill, and Belltown each give you a different kind of street energy.
- A 35mm or 50mm lens is usually the most flexible starting point, with 1/250 sec, f/4, and Auto ISO as a practical baseline.
- Personal-use shooting is usually straightforward, but professional or commercial work on park property can require advance permission.
- A downtown-to-Capitol Hill walk is long enough to build a real sequence of images without feeling like a marathon.
Why Seattle works so well for candid street scenes
What I like most about Seattle is that it rarely gives you a flat visual environment. The city has water, ferries, steep streets, covered markets, narrow alleys, glass façades, and older brick districts that still feel lived-in. That mix matters, because candid street work depends on friction. When a commuter crosses a wet intersection, a vendor resets a stall, or a neon sign reflects off pavement after rain, the frame already has tension before anyone even notices the camera.
Seattle also changes mood quickly. A block that feels quiet in the morning can turn layered and noisy by lunch, then become nearly cinematic once the light drops and the reflections come alive. I think that is why the city suits observational work so well. You are not just photographing people on a street, you are photographing how people move through weather, architecture, and public space. Once you start seeing that pattern, the rest of the city becomes easier to edit visually.
That mix of density and contrast is the reason I usually build a route instead of chasing a single landmark, because the next frame is often only a few minutes away.
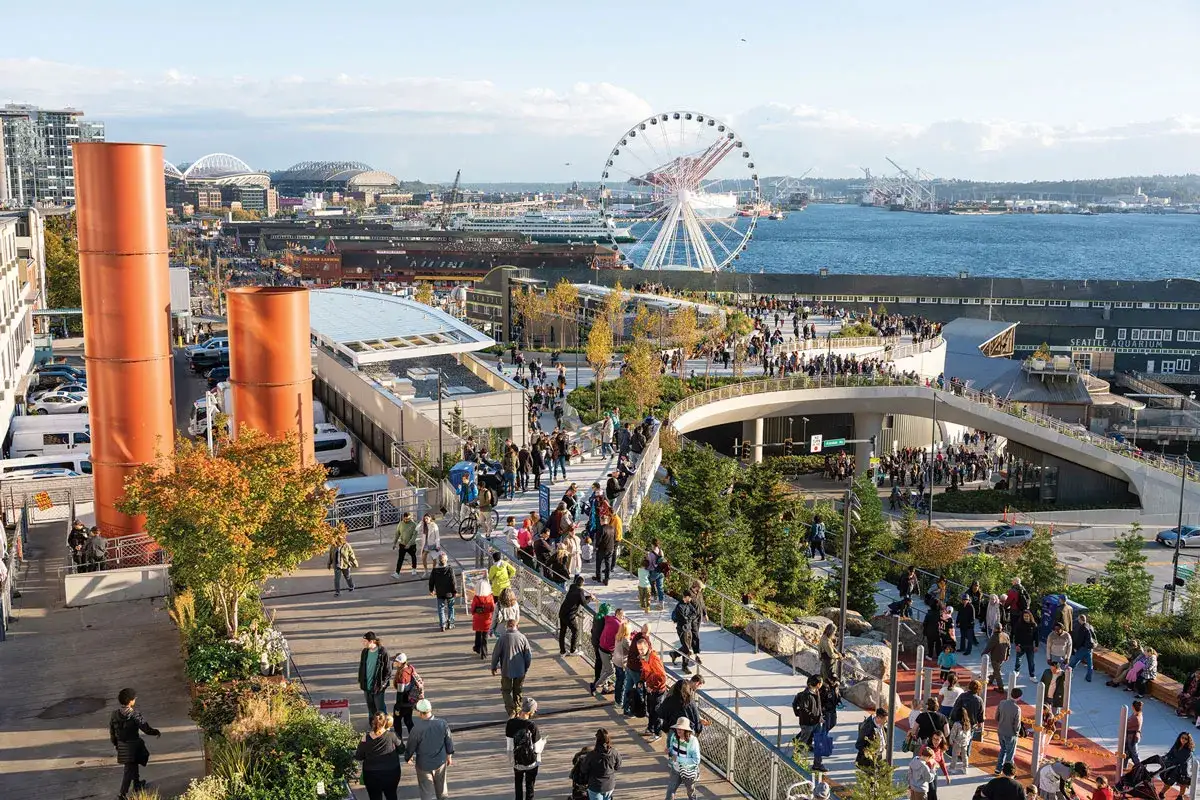
Where I start when I want the city to do the heavy lifting
The best places for street work in Seattle are the ones that naturally create interaction, overlap, and movement. I look for foot traffic, layered backgrounds, and places where people pause without realizing they are pausing. That is usually where the candid moments show up.
| Area | What it gives you | Best time | Main thing to watch |
|---|---|---|---|
| Pike Place Market | Dense crowd flow, vendors, gestures, and plenty of layered foregrounds | Early morning or late afternoon | Tourist congestion can flatten the scene if you stay in one spot too long |
| The waterfront | Reflections, open space, ferries, and a strong mix of movement and calm | After rain, at blue hour, or when clouds break | Wind and open light can make exposures less forgiving |
| Pioneer Square | Historic texture, brick, shadows, and a more documentary feel | Morning or late day | Watch for empty frames that need a moving subject to feel alive |
| Capitol Hill and Pike-Pine | Retail life, nightlife, crosswalks, and stronger character portraits | Late afternoon into evening | Mixed indoor and outdoor lighting can complicate exposure fast |
| Belltown and Seattle Center edges | Geometry, big shapes, and pedestrian movement against modern architecture | Overcast midday or dusk | Some spaces behave more like managed campuses than open streets |
If I only have half a day, I like a downtown-to-Capitol Hill walk. Visit Seattle maps that route at 3.3 miles and about 1.5 to 2 hours on foot, which is enough distance to make the edit feel varied without wasting time on transit. I treat that walk as a moving contact sheet: market density first, downtown transitions next, then a more local neighborhood rhythm as I climb uphill.
What makes these areas useful is not just that they look photogenic. It is that each one pushes a different kind of frame. Pike Place gives you compression and crowd energy, the waterfront gives you space and reflections, and Capitol Hill gives you faces, storefronts, and motion that feels more immediate. That contrast leads naturally into technique, because the best location still fails if you stand in the wrong place or react too slowly.
How I work a candid frame without turning it stiff
For street photography, I try to stay a step behind the action. If I am too eager, the frame becomes reactive and the subject starts to feel managed. My preference is to arrive early, watch for repeated motion, and wait for the moment when a person briefly resolves the scene by crossing it. That is usually more interesting than asking the city to pose for me.
Keep your presence light
I move slowly, keep my camera ready, and avoid dramatic gestures. In practice, that means I am usually pre-focused before the subject reaches the point where I want to shoot. The less I fumble with the camera, the more natural the moment stays. A small prime lens helps here because it keeps the setup simple and discourages me from overthinking the frame.
Read the background before the subject
A candid photo is only as good as the space behind the person. Seattle is full of signs, poles, reflections, storefront clutter, and overlapping pedestrians, so I check the background first. If the line of a building or a bright sign cuts through someone’s head, I wait or shift a step. That tiny repositioning usually improves the image more than changing cameras or lenses.
Read Also: Aquarium Photography Guide - Capture Stunning Fish Photos
Know when a candid frame should become a conversation
There is a point where patience stops being useful and respect matters more than the shot. If someone notices me, I do not keep pushing for the same frame. I either lower the camera, move on, or ask directly if the scene has become a portrait instead of a candid. In most cases, that choice protects the work and the mood. A tense interaction tends to ruin more images than it saves.
Once the frame is under control, the next variable is the light, and Seattle’s light is worth taking seriously because it changes the entire exposure strategy.
Gear and settings that hold up in Seattle light
I do not think Seattle requires exotic gear, but it does reward gear that is fast, simple, and tolerant of imperfect weather. A 35mm lens is my default when I want context and environment. A 50mm is better when I want to isolate a gesture or clean up a busy frame. If I expect a lot of movement, I keep shutter speed higher than I think I need, because the city is full of small motion that becomes obvious once you review the files.
| Condition | Starting settings | Why it works |
|---|---|---|
| Overcast daylight | 1/500 sec, f/4, Auto ISO | Enough shutter speed for walking subjects without forcing the scene too dark |
| Rain and wet pavement | 1/250 sec, f/2.8 to f/4, exposure compensation around +0.3 to +1 | Protects the midtones and keeps reflections visible instead of muddy |
| Evening and neon | 1/250 sec, f/1.8 to f/2.8, ISO 1600 to 6400 | Lets you keep people sharp enough while preserving the city’s glow |
| Crowded transit or crosswalk scenes | 1/320 sec, f/2.8, Auto ISO with a minimum shutter floor | Helps freeze the mix of walkers, buses, and changing posture |
I also keep a rain cover or weatherproof bag with me. Seattle does not demand heroics, but it does punish laziness. A microfiber cloth, a spare battery, and a body that is easy to wipe down matter more than people expect. If I am shooting in tight pedestrian areas, I prefer a compact setup over a big zoom because the smaller kit is easier to work with and less likely to make the scene feel performative.
The practical rule here is simple: start with a forgiving baseline, then adjust only when the light or motion forces you to. That leads directly into the less glamorous part of the job, which is knowing when a public-looking place is not actually free for any kind of setup.
When permissions start to matter
For personal walking-around shooting, Seattle is usually straightforward. The line changes when the work becomes commercial, uses significant setup, or starts to interfere with the space around you. Seattle Parks and Recreation says photography applications must be submitted 3 to 14 days in advance for professional or commercial photography on park property, and personal-use shooting is generally fine unless the setup becomes large or disruptive.
That is the rule I respect most: the more my shoot looks like a production, the more I assume I need permission. Tripods, assistants, props, branded work, or a group that blocks the flow of a public space can move a simple outing into permit territory fast. If I am working for a client, selling the images, or planning to stay in one spot for a long time, I check the rules before I leave home instead of arguing with them on site.
This is also where discipline helps the final edit. If the location forces you to move fast, simplify your gear and keep the plan narrow. If you need more control, budget extra lead time and assume the city will ask for it. Once you know the rule set, you can plan a route that gives you enough variety without making the day feel chaotic.
A route that gives you enough variety for one session
When I want a reliable first outing, I build a route that starts dense and ends more open. The downtown-to-Capitol Hill walk works well because it gives me several visual moods in one stretch: market energy, downtown geometry, storefront life, and then a neighborhood that feels more local and less obviously tourist-driven. That progression matters because it keeps the edit from feeling repetitive.
I usually start near Pike Place Market, work through the Westlake area, then move into the Pike-Pine corridor and up toward Cal Anderson Park or Broadway. If I still have energy, I keep walking until I hit the more residential edge of Capitol Hill. On a wet day, I stay alert for reflections in the crosswalks and storefront glass. On a dry day, I look harder for body language, because the image needs to do more without the weather helping it.
The main benefit of a route like this is that it creates momentum. Instead of hunting one perfect frame, I build a sequence. That is a better way to learn a city, and it gives you a cleaner set of images when you sit down to edit later.
The scenes I would not skip on a return walk
When I come back to a city like this, I stop chasing only the obvious postcard view and start looking for the scenes that carry mood. Those are usually the frames that age better, because they tell you how the city felt, not just how it looked.
- A commuter pausing under an umbrella while everyone else moves around them.
- A vendor resetting a display after a brief rush at the market.
- A crosswalk reflection that turns the street into a second image.
- A ferry passenger framed against gray water and open space.
- Two or three strangers sharing a narrow sidewalk without noticing the symmetry they create.
Those are the moments I keep coming back for because they make the city feel lived-in instead of staged. If you want your work to feel specific to Seattle rather than generic urban photography, give those quieter frames room in the edit, keep walking after the obvious landmark shot, and let the city’s weather, pace, and crowd flow finish the composition for you.
