
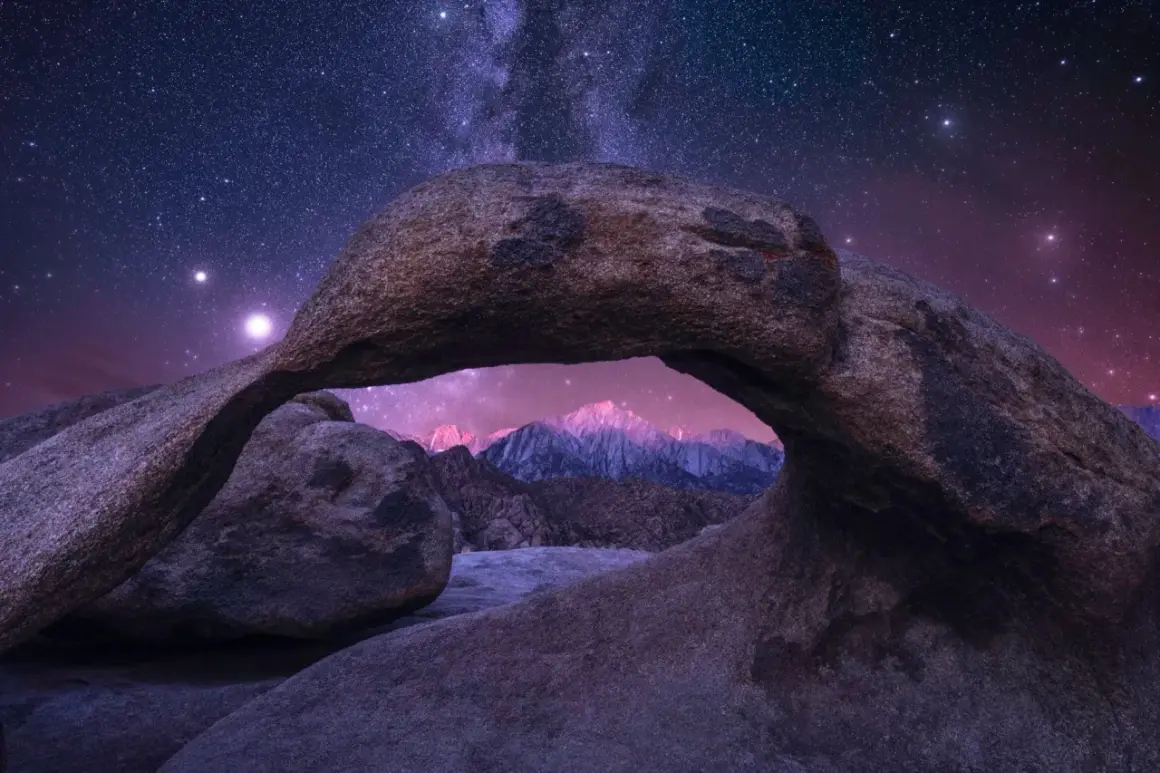
Capturing a starry sky is less about luck than about controlling light, timing, and location. In this guide, I break down how to choose the right dark site, which camera settings actually hold up after sunset, and how to shape the frame so the result feels deliberate rather than accidental. I also cover the most useful night-sky styles, from clean point-star landscapes to trails and Milky Way compositions, because the best approach depends on the story you want the image to tell.
The decisions that matter most before the first exposure
- Dark sky quality matters more than extreme camera settings. A cleaner sky usually beats a more expensive body.
- A tripod, manual mode, and RAW capture are non-negotiable. They give you the control night photography needs.
- Different subjects need different exposure strategies. Pinpoint stars, trails, and tracked frames are not the same problem.
- Foreground shape changes the whole image. Rocks, water, trees, and ridgelines give the stars scale.
- Noise control and restrained editing usually matter more than heavy sharpening. A clean file looks more believable than an overworked one.
Start with the sky quality, not the shutter speed
I use the Bortle scale as a quick reality check: the lower the class, the less light pollution I have to fight. In practical terms, a moonless night in a Bortle 1 to 3 area gives me the cleanest star fields, while suburban skies usually force me into shorter exposures, more noise, or a different style altogether. Thin haze, humidity, and high clouds can flatten contrast even when the sky looks clear to the eye.
When I plan a session, I look at more than just cloud cover. I want a night when the moon will not wash out the frame, and I usually prefer to shoot either near new moon or before moonrise. In the western United States, desert basins and high-elevation parks often give the easiest first results, but any place with genuinely dark surroundings can work if the horizon is open and the air is transparent.
- Choose a new moon or a night when the moon rises late.
- Check both cloud cover and sky transparency if you can find them.
- Scout the composition before dark so you are not framing blind at midnight.
- In parks and protected areas, verify rules about artificial light before you use light painting.
The big idea is simple: better sky conditions reduce how hard everything else has to work, and that makes every later decision easier. Once the sky is worth shooting, the next question is whether your setup can keep pace without wobble.
Build a setup that stays still in the dark
The camera body matters less than most beginners think. I would rather work with a modest sensor and a fast lens than a great sensor on a weak tripod, because blur kills night files faster than noise does. The basic goal is boring but effective: keep the camera absolutely steady, let in as much light as you can, and avoid touching the camera while the shutter is open.
| Item | Why it matters | What I look for |
|---|---|---|
| Tripod | Stops vibration during long exposures | Rigid legs, a solid head, and minimal center-column extension |
| Wide-angle lens | Captures more sky and slows apparent star movement | About 14-24mm on full frame, or the APS-C equivalent, with a wide aperture |
| Remote or timer | Prevents shake when the shutter opens | A two-second timer is enough for many setups |
| Spare power | Cold nights drain batteries fast | One warm spare battery in a pocket |
| Red light | Protects night vision | Low output, pointed away from the frame |
If I am shooting from a damp field or near a lake, I also think about lens dew. A simple lens heater or a microfiber cloth can save a session when the temperature drops after midnight. A modern phone can also produce usable night images, but it needs a stable mount and a long-capture mode; the ceiling is just lower if you want very clean star detail. With the setup sorted, the creative choice becomes easier: do you want pinpoint stars, motion, or a sky subject that dominates the frame?
Pick the style before you pick the settings
I think in terms of style first, because the goal changes the exposure. A static star field rewards precision, while trails and tracked frames reward patience. The subject also changes: sometimes the stars are the subject, but often the land, water, or silhouette is what gives the sky its scale.
| Style | Best subject | What it gives you | Best fit |
|---|---|---|---|
| Pinpoint stars | Wide landscapes, constellations, minimal scenes | Clean, realistic night detail | Moonless skies and fast lenses |
| Milky Way landscape | Ridges, dunes, lakes, arch rock, coastlines | Cinematic depth and scale | Dark sites with a strong foreground |
| Star trails | Rock formations, cabins, trees, a single anchor point | Motion and a graphic circular pattern | Very long capture times or stacked frames |
| Moonlit scene | Architecture, mountains, water, trees | More land detail and softer contrast | When you want the landscape to share attention |
| Telephoto sky detail | The moon, bright constellations, rising celestial objects | Compression and isolation | When the subject in the sky is the whole story |
If I had to choose only one style for a first outing, I would start with a wide Milky Way landscape. It teaches composition, exposure, and foreground management in one shot, and it is more forgiving than a pure star-trail project. That creative choice feeds directly into exposure, because each style tolerates a different amount of motion and noise.
Dial in exposure and focus without losing the stars
My starting point is usually a fast wide lens, manual mode, and RAW capture. From there I adjust shutter speed first, because that is the line between crisp stars and visible trailing. If the stars begin to stretch, I shorten the exposure before I keep pushing ISO upward.
| Style | Starting shutter | Aperture | ISO | Notes |
|---|---|---|---|---|
| Pinpoint stars | 8-15 seconds | As wide as the lens stays sharp | 1600-3200 | Shorten the exposure if the stars start to stretch |
| Milky Way | 10-20 seconds | f/1.4 to f/2.8 | 3200-6400 | Trade a little noise for structure in the galactic core |
| Star trails | 30 seconds repeated, or multi-minute frames | Wide open or near it | 800-3200 | Stacking short frames often looks cleaner than one very long frame |
| Moonlit landscape | 15-30 seconds | f/2.8 to f/5.6 | 800-3200 | Protect highlights on bright rock, snow, or water |
These are starting points, not rules. A modern full-frame sensor can usually stay cleaner at higher ISO than an older APS-C body, but the field truth stays the same: if the stars smear, shorten the shutter before you keep cranking sensitivity. For focus, I switch to manual focus before dark if I can, then use live view magnification on a bright star or a far light source. The infinity mark on a lens is only a rough guide, and on many lenses it is not precise enough for night work.
- Set focus before the sky goes fully dark whenever possible.
- Use live view magnification rather than trusting the naked eye.
- Lock the focus ring if the lens tends to drift.
- Use stacking when a single frame gets too noisy, because 10 to 20 shorter frames are often cleaner than one pushed file.
If I need even cleaner results, I reach for stacking before I buy a tracker. A tracker goes further, but it adds setup time and usually means the foreground needs separate treatment. Once exposure is under control, composition becomes the part that decides whether the photo feels like a real place or a generic sky sample.
Compose the frame so the night feels intentional
I spend more time moving a few feet left or right than most people expect. In night photography, that small shift can turn a flat scene into one with depth, leading lines, and a clear subject. The hardest part is not finding stars but balancing them with something on Earth that gives the image scale.
- Foreground first. Rocks, trees, water, cabins, and roads anchor the sky and keep the frame from floating away.
- Use lines. A ridge, shoreline, or river can pull the eye toward the brightest part of the sky.
- Respect the horizon. Keep it level unless the composition clearly benefits from a tilt.
- Choose vertical when the sky dominates. Go horizontal when the land matters just as much as the stars.
- Leave breathing room. Empty darkness can be powerful if it supports the subject instead of swallowing it.
If the Milky Way stretches beyond a single frame, I often shoot a stitched panorama rather than forcing an ultra-wide lens to do everything. That keeps foreground shapes cleaner and avoids the stretched look that some wide lenses create near the edges. I will also use subtle light on the foreground when the scene needs it, but I keep it restrained and natural; too much light instantly breaks the mood. After the frame is built, careful editing should refine that balance instead of replacing it.
Edit with restraint and plan the next clear night
I treat night editing like finishing work, not a rescue mission. RAW files give me room to adjust color and exposure, but they cannot invent focus or recover a sky that was badly polluted by light to begin with. My aim is always the same: keep the stars believable, keep the shadows readable, and avoid pushing the file so hard that it starts looking synthetic.
- Set white balance first, usually somewhere around 3500K to 4500K as a starting point.
- Lift shadows carefully and watch the background for blotchy noise.
- Reduce noise in small passes instead of one aggressive move.
- Sharpen stars lightly; if they look crunchy, back off.
- Blend sky and foreground only when a single exposure truly cannot hold both.
Modern AI denoise tools are useful, but I still inspect the stars at 100% to make sure they stay round and natural. I also keep notes on every session: location, moon phase, lens, shutter speed, ISO, and whether humidity was a problem. That log is often more useful than any preset because it turns one clear night into a repeatable workflow. If I were starting from scratch tonight, I would pick a dark site, bring a fast wide lens on a rigid tripod, shoot one clean static frame before chasing trails, and leave room in the composition for the land to matter. That sequence produces more useful images than trying every technique at once, and it turns night photography into a method instead of a guess.
