
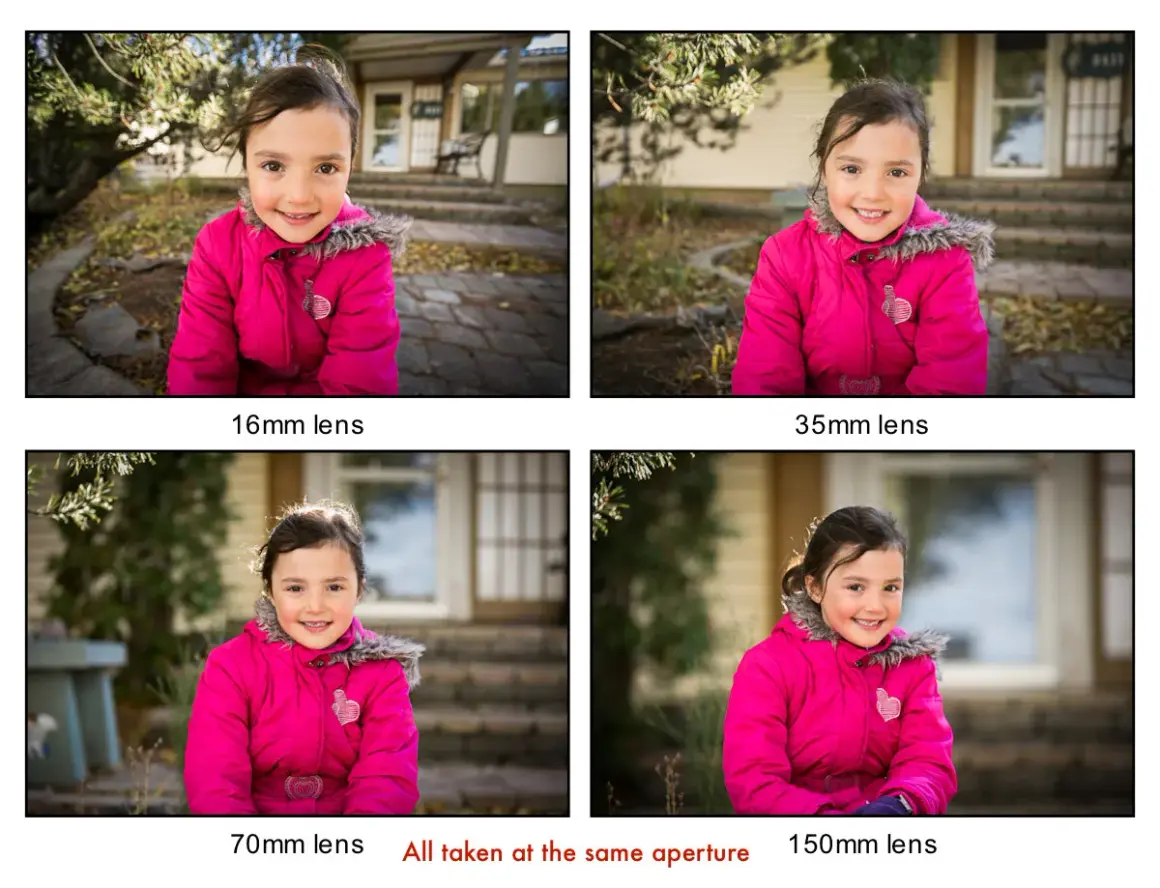
The main decisions that control background blur
- Open the aperture first. Lower f-numbers such as f/1.4, f/1.8, and f/2.8 create the shallowest depth of field.
- Use focal length and distance together. Longer lenses and a larger gap between subject and background usually matter more than beginners expect.
- Filters are supporting tools. ND filters help you keep a wide aperture in bright light; they do not create blur on their own.
- Diffusion and polarizing filters change the mood, not the optics. They can soften highlights or control reflections, but they are not substitutes for subject separation.
- Sensor size matters. Full-frame makes the effect easier, but APS-C and Micro Four Thirds can still work well with the right lens and framing.
Why some scenes blur cleanly while others do not
The biggest misconception is that a soft background comes from one magic setting. It is really the result of four variables working together: aperture, focal length, camera-to-subject distance, and subject-to-background distance. When I want a clean result, I usually think in that order instead of chasing a single lens number.
- Aperture controls how wide the lens opens. A lower f-number means a shallower depth of field and more blur behind the subject.
- Focal length changes perspective and compression. Longer lenses, such as 85mm or 135mm, make background separation feel stronger.
- Distance to the subject matters because the closer you are to focus, the thinner the sharp zone becomes.
- Distance from the subject to the background often makes the largest visible difference. A subject 2 meters from the camera with a wall 10 meters behind them will usually look more isolated than the same subject standing 1 meter from that wall.
Bokeh is the quality of the blur, not just the amount of it. A lens can render soft, pleasing highlights or harsh, nervous ones, even when the depth of field is similar. That is why two lenses at the same aperture can feel very different in real use. Once those pieces are in place, sensor size changes how easy the look is to get.
How sensor size changes the result
Full-frame, APS-C, and Micro Four Thirds cameras can all produce attractive background separation, but they do not behave identically. If you are comparing systems, the key is to compare framing and aperture together, not just the label on the body. Equivalent focal length describes the angle of view, not the physical size of the lens.
| Sensor format | Typical impact on blur | What it means in practice |
|---|---|---|
| Full-frame | Easiest to isolate a subject at moderate apertures | A 50mm f/1.8 or 85mm f/1.8 already gives strong separation for portraits and brand work. |
| APS-C | Slightly deeper depth of field at the same framing | You can still get excellent blur, but a fast prime or longer lens helps more. |
| Micro Four Thirds | Deeper depth of field again at the same framing | Great for compact kits, though you usually need wider apertures, more subject distance, or a longer lens to make the background fall away hard. |
In real shoots, that means full-frame often gives you the look with less effort, while smaller sensors ask for more careful lens choice and framing. That is not a deal-breaker. It just means the lens matters more, which is exactly where the next decision comes in.
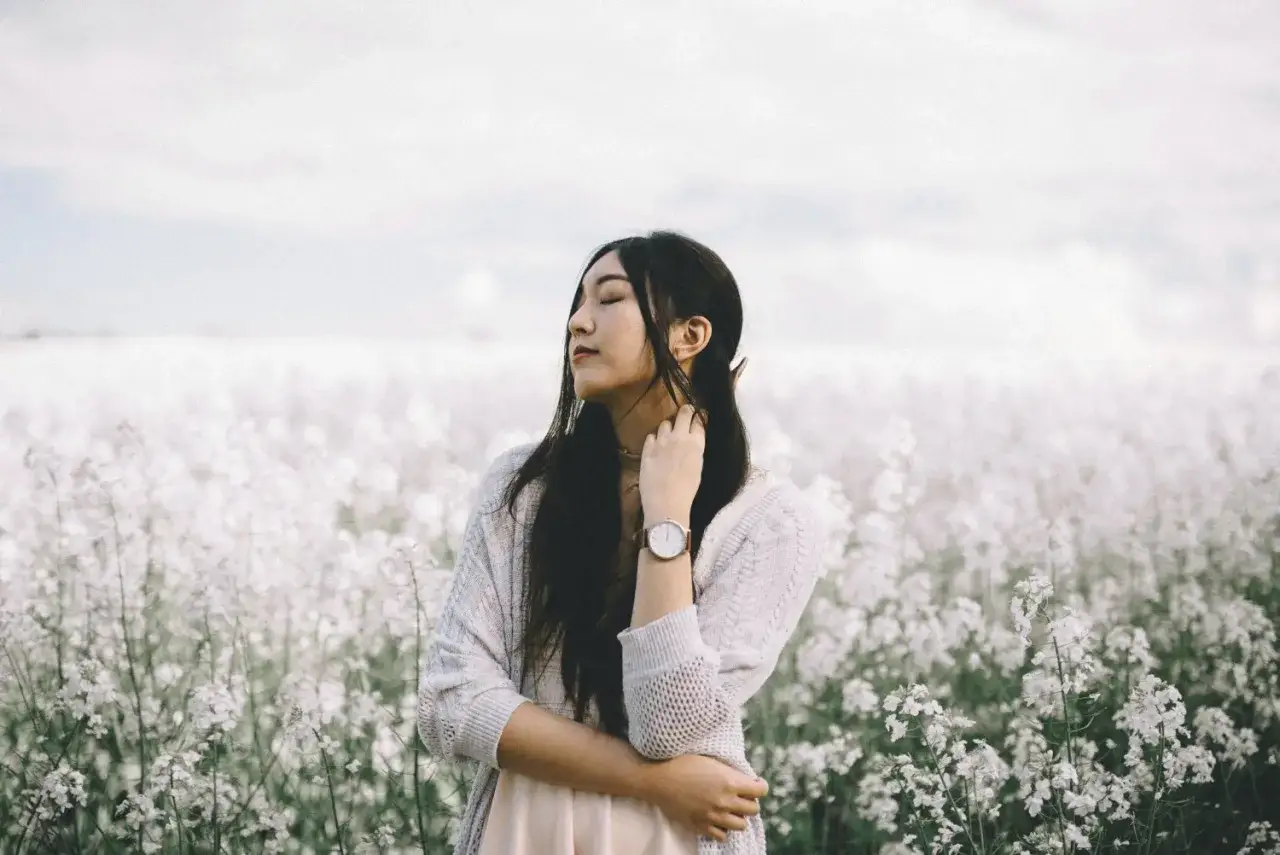
The lenses that make the effect easiest to control
If I want reliable separation, I usually reach for a fast prime or a short telephoto zoom. A fast lens is simply one with a large maximum aperture, such as f/1.8 or f/2.8. Those lenses give you room to open up when the scene demands it, and that matters more than most people think.
| Lens type | Why it helps | Best use | Watch out for |
|---|---|---|---|
| 50mm f/1.8 prime | Affordable, bright, and flexible in tight spaces | Portraits, creator content, everyday brand photography | Needs decent subject-background distance to look truly soft |
| 85mm f/1.8 or f/1.4 prime | Strong subject separation and flattering perspective | Headshots, editorial portraits, clean hero images | Requires more room; indoors it can feel tight |
| 70-200mm f/2.8 zoom | Excellent compression and framing flexibility | Events, campaigns, location work, social assets | Heavier and more expensive than a prime |
| 90-105mm macro lens | Focuses close and isolates small subjects very well | Products, detail shots, cosmetics, food, packaging | Depth of field gets extremely thin at close range |
| Wide-angle fast prime | Can still blur the background if you work close | Environmental portraits and storytelling frames | The blur looks less compressed and more scene-driven |
My rule of thumb is simple: the faster the lens and the longer the focal length, the easier it is to isolate the subject. Still, I would not ignore a wide-angle lens completely. If you get close to the subject and push the background far away, even a 35mm lens can produce a convincing sense of separation. The difference is that the look feels more contextual and less compressed than a telephoto frame, which leads directly into the role of filters.
Which filters help and which ones do not
This is where expectations often get messy. Filters can support the look, but most of them do not create optical blur by themselves. They change how much light enters the lens, how reflections behave, or how highlights are rendered. That still matters, because the wrong filter can force you to stop down or can soften the image in a way you did not want.
| Filter | What it actually changes | When it helps | Main limitation |
|---|---|---|---|
| ND filter | Reduces incoming light by a fixed amount, often 3, 6, or 10 stops | Lets you shoot wide open in bright daylight without overexposing | Does not change depth of field on its own |
| Variable ND | Adjustable light reduction, usually for 2-5, 2-6, or similar stop ranges | Useful for video, changing light, and fast outdoor work | Can introduce color cast or an X-pattern at stronger settings |
| Diffusion or mist filter | Softens highlights and lowers contrast slightly | Gives portraits and lifestyle shots a more cinematic feel | Can reduce crispness, which is not ideal for every brand or product image |
| Polarizing filter | Reduces reflections and deepens skies | Helpful for glass, water, shiny packaging, and outdoor color control | Almost no direct effect on background blur and it costs light |
| Close-up filter or diopter | Lets the lens focus closer than it normally would | Budget-friendly option for detail shots and small products | Not a general portrait solution; edge quality varies by build |
If I had to choose one filter for this goal, it would be an ND filter. It is the one tool that protects your aperture choice when the sun is too bright. A 3-stop ND is often enough for overcast or late-day work, while a 6-stop or 10-stop filter becomes more useful in harsh midday light or in video, where you want to keep shutter speed in a natural range.
Practical setups for portraits, products, and video
Gear only becomes useful when it fits a real shooting situation. Here is how I would set up the most common cases where background separation matters.
Portraits
For portraits, I usually start with an 85mm lens on full-frame and shoot between f/1.8 and f/2.8. That range gives strong separation without making eyelashes sharp and ears soft in a way that feels accidental. I also try to keep the subject at least 2 to 3 meters from the camera and several more meters from the background. If I am shooting outdoors in strong sunlight, an ND filter lets me stay wide open instead of forcing the aperture closed.
Products and close-ups
For product work, I prefer a 90mm to 105mm macro lens or a short telephoto. The goal changes a bit here: I want the product itself sharp enough to sell the texture, label, and edges, while the background stays calm. That often means stopping down to f/4 or f/5.6 rather than chasing the widest aperture available. If the item is reflective, a polarizer can help more than another stop of blur, because clean reflections often matter more than extreme background softness.
Read Also: Nikon 200mm f/2 - Is This Specialist Lens Right For You?
Brand video and social content
For video, I often pair a 35mm or 50mm lens with a variable ND filter. At 24 fps, a shutter speed around 1/50 is the usual target; at 30 fps, 1/60 is the standard starting point. The filter keeps exposure under control while the wide aperture preserves separation. That combination is especially useful for branded content shot outdoors, where you want a polished look without turning the scene into a technical compromise.
Once you match the lens and filter to the job, the effect becomes much more predictable. The remaining problems are usually compositional, not technical, which is why the next section matters so much.
What usually ruins the look before the lens does
When a background refuses to soften, I usually look at the scene before blaming the gear. The camera is often doing exactly what it should; the frame just gives it too little help.
- The subject is too close to the background. Fix it by pulling the subject forward, even 1 to 2 meters can make a visible difference.
- The lens is too wide for the framing. A wide-angle lens can work, but if you stand too far away, the background stays more readable.
- The aperture is too closed down. f/8 may be fine for groups or products, but it is often too conservative for portraits if you want strong separation.
- The background itself is visually loud. Bright edges, patterns, and high-contrast shapes remain distracting even when softened.
- The filter is adding problems instead of solving them. Cheap variable NDs can create color shifts or uneven darkening that make a clean image harder to get.
The cleanest fix is usually the simplest: move the subject farther from the background, use a faster lens, and open the aperture as far as the scene allows. That sequence solves more cases than swapping filters ever will. With that in mind, the last thing I would build is a basic kit that gives you room to work.
The first kit I would choose for reliable separation
If I were building a simple setup for this effect, I would start with a 50mm f/1.8 or 85mm f/1.8, a solid 3-stop or 6-stop ND filter, and nothing else until the look itself became consistent. That combination covers most portraits, creator content, and small product setups without pushing you into expensive glass too early.
The order of operations stays the same every time: open the aperture, separate the subject from the background, and use filters only when light or reflections get in the way. That is the cleanest way to get a background that feels intentional instead of accidental, and it is usually the difference between a competent frame and one that feels finished.
