

Deep depth of field changes how a photograph reads: instead of isolating one subject, it lets the viewer explore the whole frame, from foreground detail to distant background. That matters in landscapes, architecture, product work, and any scene where context is part of the story. In practical terms, great depth of field photography is a balance of aperture, focal length, camera position, and subject choice, not a single magic setting.
The fastest way to keep more of the scene sharp is to control aperture, distance, and focus together
- A narrow aperture such as f/8 to f/16 usually increases depth of field, but f/22 can soften detail through diffraction.
- Shorter focal lengths and a greater camera-to-subject distance both make it easier to hold more of the frame in focus.
- Landscapes, architecture, interiors, products, and group portraits benefit the most from a deep focus approach.
- Hyperfocal distance is useful when you want near-to-far sharpness without guessing where to focus.
- Focus stacking is the better answer when one frame cannot cover enough depth, especially in macro and still life work.
What deep depth of field changes in a photo
When depth of field is deep, the image feels structured and readable. The eye can move across the frame without hitting a soft blur wall, which makes this look especially valuable when the environment matters as much as the subject itself. I reach for it when I want the viewer to understand scale, place, and detail in one glance.
There is a practical side to it as well. A wider zone of sharpness gives you more room for foreground elements, midground subjects, and background context to coexist, but it also makes focus errors more visible. If the camera is slightly off, the mistake is easier to see because the image is supposed to stay crisp across a larger area.
That is why this style is so different from shallow-focus portrait work. Instead of using blur to direct attention, you are using clarity to build a complete visual field. The next step is learning which camera controls actually move that field in your favor.
The settings that actually increase depth of field
Most photographers start with aperture, but aperture is only part of the equation. The final look depends on how the lens is used, how far the camera is from the subject, and where the focus point lands inside the scene. I find that beginners improve faster when they think about those variables together instead of chasing one number on the dial.
| Factor | What increases depth of field | Useful starting point | Tradeoff |
|---|---|---|---|
| Aperture | Smaller opening | f/8 to f/11 for most general scenes, f/13 to f/16 when you need more reach | Less light, slower shutter speed, possible diffraction at very small apertures |
| Focal length | Shorter lens | 16mm to 35mm for landscapes and interiors | Perspective changes, more foreground exaggeration |
| Camera distance | Stand farther back | Move away when composition allows it | You may lose foreground impact or framing control |
| Focus point | Place focus deliberately | About one-third into the scene, or at hyperfocal distance when needed | Requires judgment or a calculator app for consistency |
| Support | Tripod, timer, remote release | Use whenever shutter speed drops below a safe handholding level | Less mobility, slower setup |
The aperture choice matters most in a visible way: a narrow setting like f/8 to f/11 gives you a reliable amount of sharpness without usually pushing the lens too hard. I only go smaller, such as f/16 or f/22, when the scene truly needs it. At that point, I am trading some optical crispness for coverage, and that tradeoff should be deliberate, not accidental.
Focal length and distance are just as important. A wide-angle lens makes it easier to hold more of the frame in focus, while stepping back gives the lens more room to work. That is why a wide scene photographed from a comfortable distance often looks sharper front to back than a tight composition shot from close range, even if the aperture is identical.
Which styles and subjects benefit most
Not every subject wants deep focus, but some genres depend on it. In those cases, the technique is not just a technical choice; it is part of the visual language of the image. The scene has to explain itself, and sharpness across the frame helps that happen.
Landscapes and seascapes
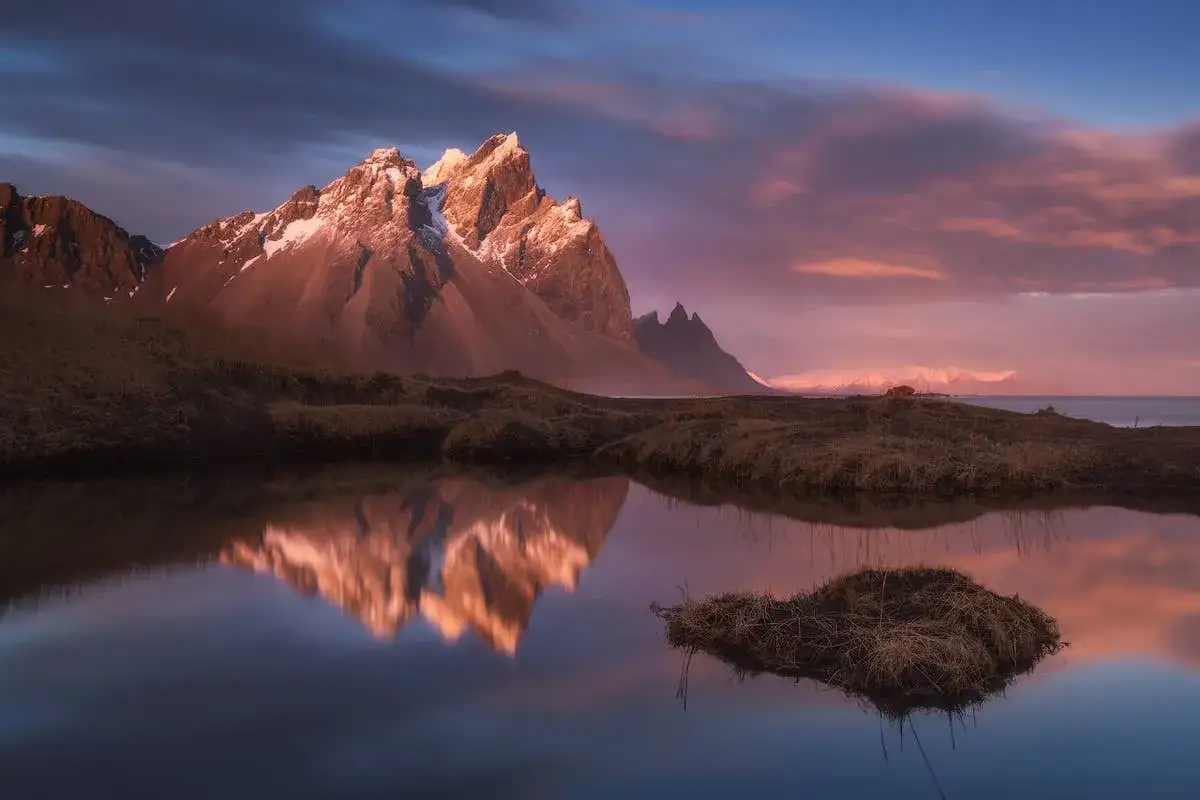
Landscapes are the most obvious fit because the image often needs near-to-far clarity. A foreground rock, a midground tree line, and a distant ridge all matter to the composition, so I usually start around f/8 or f/11 and place focus carefully rather than blindly pushing to the smallest aperture. If the frame includes a strong foreground element, focus placement becomes more important than the aperture number alone.
Architecture and interiors
Buildings and interiors benefit from a deep focus approach because lines, textures, signage, and spatial relationships all need to remain legible. Here, I often favor a tripod and a narrower aperture such as f/8 to f/13, especially when the scene includes both nearby furniture and farther structural details. The point is not just sharpness; it is coherence, so the viewer understands the space in one read.
Product and editorial still life
Product photography often needs almost everything visible and readable, especially for ecommerce, packaging, and editorial spreads. A bottle, label, cap, and surrounding props may all need clarity, which is why focus stacking or a carefully chosen narrow aperture can be more useful than a dramatic blur. This is one area where great depth of field photography is often a commercial necessity, not just a style choice.Read Also: Conference Photography - Master Event Coverage That Works
Group portraits and environmental portraits
When people stand on different planes, shallow focus becomes risky fast. Group portraits usually benefit from a moderate aperture, often around f/5.6 to f/8, so faces at slightly different distances stay acceptably sharp. Environmental portraits can also use deeper focus when the location is part of the story, but I would still keep the subject separated enough from distracting background clutter to avoid a busy frame.
These subject types show the rule clearly: the more the scene depends on context, the more useful deep focus becomes. Once you know where it works best, the next step is making the setup repeatable.
A practical workflow that keeps the whole frame sharp
I like a simple field workflow because it prevents me from overthinking the shot. First I decide what part of the scene has to stay sharp, then I choose the lens and camera position that support that decision, and only then do I fine-tune aperture and focus. That sequence saves more images than any obscure trick.
- Choose the subject layers you need to keep readable, such as foreground, subject plane, and background.
- Pick a focal length that supports the composition without forcing you too close to the scene.
- Set a narrow but reasonable aperture, usually starting at f/8 or f/11.
- Place the focus point deliberately, not automatically on the nearest object.
- Use live view magnification to check critical focus if the scene is static.
- Stabilize the camera with a tripod when shutter speed becomes the limiting factor.
Live view is especially useful because it lets you confirm what the sensor is actually seeing, not just what the viewfinder suggests. If the frame is static, I will zoom in and inspect the focus on the most important plane before I commit to the shot. That habit catches mistakes early, which is better than hoping the files will look sharp later on a larger screen.
One practical note: if you stop down too far, the slower shutter speed may blur the image even when focus is technically correct. A deep depth of field only helps if the final photo is sharp enough to survive the shutter speed you end up with.
Common mistakes that make the frame look soft
Most problems I see are not mysterious lens flaws. They are simple mismatches between the scene, the settings, and the photographer’s expectation of what the camera can do in one frame.
- Stopping down to f/22 by default, even when f/8 to f/11 would deliver cleaner detail.
- Focusing too close to the foreground and losing important midground or background detail.
- Using a telephoto lens when a wider lens would make the scene easier to hold in focus.
- Ignoring diffraction, which can soften fine texture on modern high-resolution sensors.
- Handholding a slow exposure and blaming focus for motion blur.
- Letting background clutter stay in the frame simply because it is sharp.
The diffraction issue deserves special attention. Smaller apertures can expand depth of field, but beyond a point they reduce micro-contrast and fine detail. That is why I do not treat f/22 as a universal solution. In many real-world scenes, f/11 gives a cleaner result than a smaller aperture that looks impressive on paper but less crisp in practice.
The other mistake is conceptual: people sometimes chase sharpness everywhere and forget that composition still matters. A busy, perfectly sharp background is not automatically a better photograph. It only helps when the extra detail actually improves the story.
When to use hyperfocal distance or focus stacking instead
Once the scene gets more demanding, a simple small aperture may not be enough. This is where two more advanced tools become useful: hyperfocal focusing and focus stacking. I reach for them when I need a broader safety margin than a single standard exposure can give me.
| Method | Best for | Strength | Limit |
|---|---|---|---|
| Small aperture alone | Everyday landscapes, general travel, some interiors | Fast and simple | Can hit diffraction and still miss near foreground sharpness |
| Hyperfocal focusing | Landscapes, night scenes, scenes with important foreground and infinity | Maximizes usable sharpness from near to far | Works best when you know the lens and scene distance well |
| Focus stacking | Macro, product, still life, very close foreground scenes | Extends sharpness beyond what one frame can capture | Requires a static subject and post-processing |
Hypercfocal distance is the point where you place focus to keep the nearest practical part of the scene and the far background acceptably sharp. It is useful when the foreground matters but you still want the horizon or distant background to hold together. In my experience, it is one of the most underrated tools for landscape photographers because it replaces guesswork with intent.
Focus stacking is a different kind of solution. Instead of asking one frame to cover everything, you shoot several frames at different focus distances and blend them later. That is the better choice for macro work, close product detail, and still life scenes where the depth of the subject is simply too much for one exposure to handle. A stack of 3 to 15 frames is common, though the exact number depends on how close you are and how much depth the subject has.
The rule I use is straightforward: if the subject is static and the depth is extreme, stack it. If the scene is moving, simplify the composition and work with a single frame. That distinction matters more than any preset workflow.
What I would do first on a real shoot
My first move is not to dial in the smallest aperture possible. I decide what has to stay sharp, pick the lens that lets me frame the scene naturally, and then choose the aperture that gives me enough depth without sacrificing detail. That order keeps me from overengineering the shot before I even take the first frame.
If the scene is a landscape or interior, I usually start around f/8 or f/11, focus with intention, and zoom in on the rear screen to verify the critical plane. If the subject is close and the depth is too much for one exposure, I switch to stacking rather than forcing the lens to do something it cannot do cleanly. That is the practical middle ground: use the lens within its strengths, then use technique to cover the rest.
That approach makes deep focus feel less like a technical compromise and more like a visual decision. When the whole frame has to carry the story, sharpness across the scene is not just acceptable, it is the point.
