
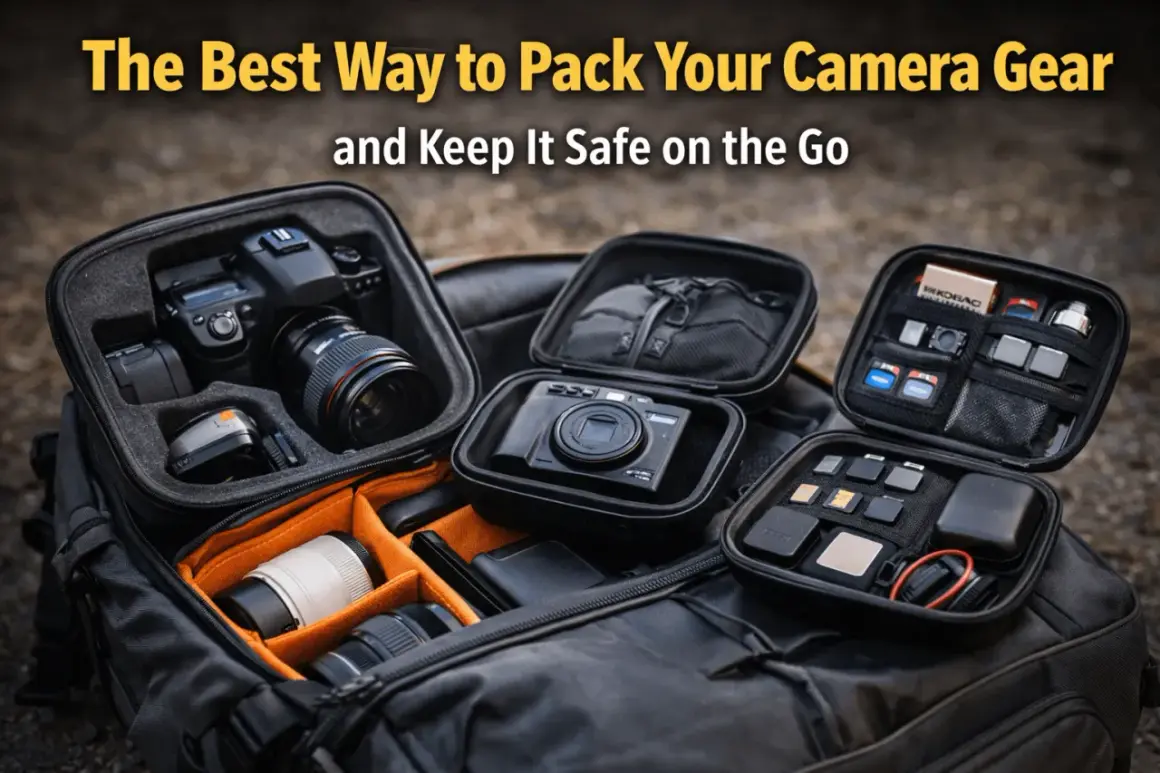
A camera bag works best when every item earns its place. I pack mine so the body, the lens I’ll use first, batteries, cards, and cleaning tools are reachable without tearing the whole setup apart, and that is what keeps both the gear and the shoot moving smoothly. Knowing how to pack a camera bag properly is less about stuffing in more equipment and more about balancing protection, access, and the kind of work you actually do.
The safest camera bags are packed for the shoot, not the shelf
- Start by choosing the kit for one specific job, not every possible scenario.
- Keep the heaviest and most fragile pieces close to your back and surrounded by padding.
- Store spare batteries and memory cards where you can find them fast, but separate them from loose metal objects.
- For U.S. flights, spare lithium batteries belong in carry-on baggage, and larger packs may need watt-hour checks before you leave.
- A repeatable layout saves time, reduces missed items, and makes repacking after a shoot much easier.
Start with the shoot, not the gear pile
The easiest way to overpack a camera bag is to treat it like a storage bin. I get better results when I decide what I’m shooting first, then pack only the gear that changes the outcome. A travel day, a portrait session, an event, and a video shoot each reward a different setup.
| Shoot type | What I pack | Why it works |
|---|---|---|
| Travel and street | One body, one versatile lens, one spare battery, two memory cards, cloth | Lightweight and fast enough for changing scenes |
| Events | One body, a second lens, two to three batteries, cards, small flash or trigger | Minimizes lens swaps when the pace is unpredictable |
| Outdoor or hiking | One body, one weather-ready lens, rain cover, two batteries, filter pouch | Keeps weight down and protects against the environment |
| Video or hybrid | Body, audio gear, larger batteries, ND filters, charger, cable pouch | Covers power, sound, and exposure control in one bag |
If an item does not support that day’s shots, I leave it out. That sounds obvious, but it is the habit that keeps the bag light and the layout flexible. Once the kit is trimmed, the next question is where each piece should sit in the bag.
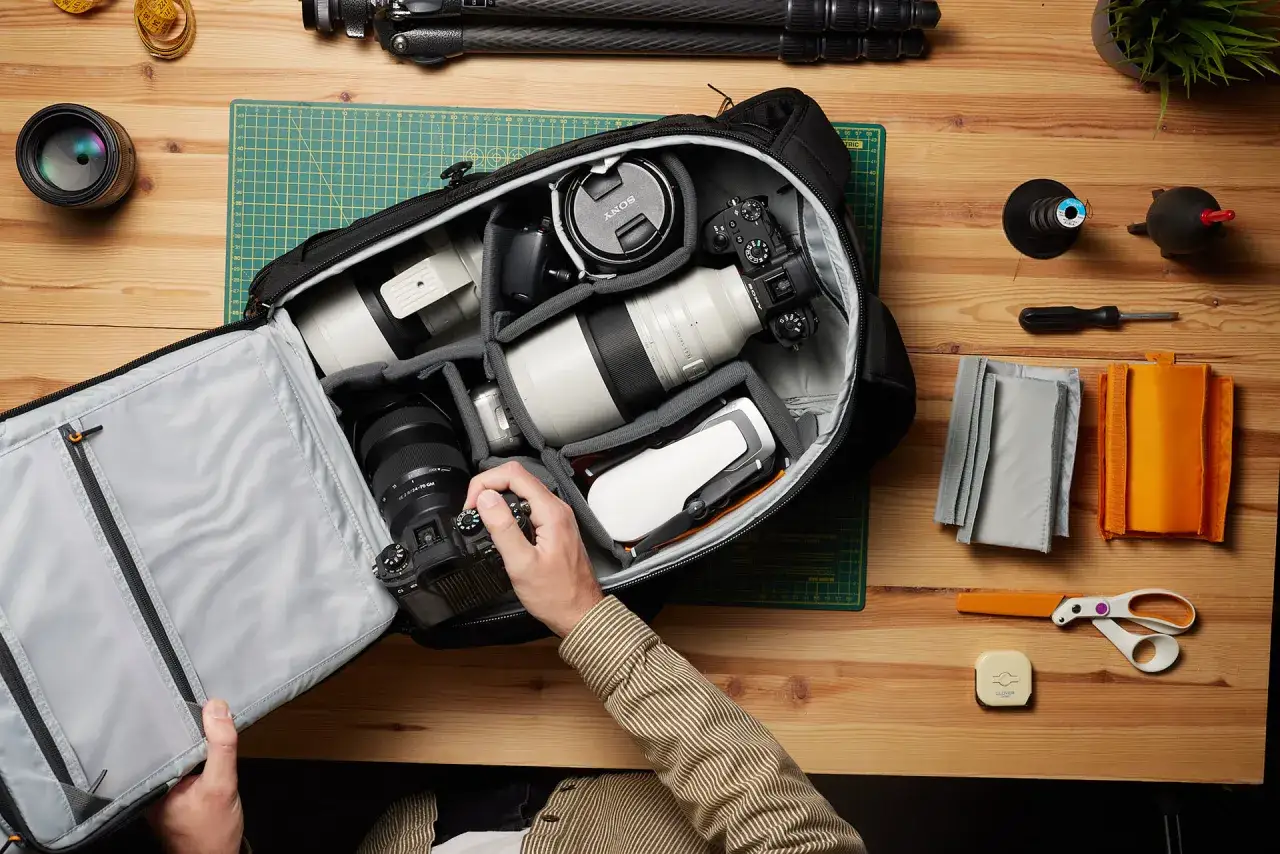
Build the bag from the center out
My rule is simple: heavy gear close to my back, fragile gear fully supported, and frequently used items where I can grab them without unpacking the whole bag. The center of the bag should hold the camera body and the heaviest lens; outer pockets are for the small, light things that would otherwise disappear.
| Bag zone | Best for | Why it works |
|---|---|---|
| Close to the back | Camera body, large zoom, lens with cap on | Improves balance and keeps the heaviest gear stable |
| Upper section | Batteries, cards, cloth, remote, ND filters | Quick access without disturbing the main kit |
| Side pockets | Water bottle, rain cover, phone, small tripod plate | Keeps non-fragile items separate from glass and sensors |
| Flat sleeve or panel | Charger, cable pouch, notebook, release forms | Prevents hard items from pressing against lenses |
I also use the dividers more aggressively than most people do. If a lens can move even a little, the divider is too loose. Tight padding stops shifting, stops rattling, and gives the bag a cleaner shape, which matters more than people think when you are walking, climbing stairs, or moving fast between locations. That physical layout matters, but the items that fail first are usually the small, easy-to-forget ones.
Protect the pieces that break first
Most damage comes from motion, pressure, or a small object rubbing where it should not. That is why lens caps, body caps, and padded pouches matter more than they look at first glance. I also treat batteries and memory cards as gear that needs its own system, not loose items floating in a pocket.
- Keep front and rear caps on every lens you are not using. Dust and scratches are far easier to prevent than to fix.
- Reverse the lens hood if the lens still closes safely with it attached. It saves space without adding much risk.
- Use a rigid card wallet instead of dropping SD or CFexpress cards into a pocket. That keeps them from bending, losing labels, or getting lost.
- Store spare batteries in a battery case or with protected terminals. Loose batteries can short against keys, coins, or chargers.
- Keep metal items away from exposed contacts. A charger brick or keyring can create a problem in a crowded pocket.
- If the bag gets wet, dry the gear before sealing it inside for the night. A damp bag closed overnight can turn into a moisture trap.
For air travel in the U.S., I keep spare lithium batteries and power banks in carry-on luggage only. If I am traveling with larger video batteries, I check the watt-hour rating before I leave: under 100 Wh is the simple range, 101 to 160 Wh can require airline approval, and anything above that can quickly stop being worth the hassle. That one rule has saved me from bad airport decisions more than once, and it leads naturally into the issue of access, because protected gear still has to be usable when the light changes fast.
Pack for access, not just capacity
A bag can be fully protected and still be frustrating if you have to unzip three layers to reach the thing you use every ten minutes. I prefer layouts that make the first lens, spare battery, and cards available with one smooth motion. That matters even more on weddings, corporate shoots, and street work, where missed moments are usually the result of slow access rather than missing gear.
| Bag style | Best for | Tradeoff | How I pack it |
|---|---|---|---|
| Backpack | Travel, all-day shoots, heavier kits | Slower access than a sling | Body and lenses in the center, small items in the top pocket |
| Sling | Street work, events, minimal kits | Less capacity and more shoulder load | One body, one mounted lens, two small pockets for cards and batteries |
| Messenger | Documentary, editorial, commuting | Less balanced on long walks | Flatter layout, soft pouches, quick-access accessories |
| Roller | Studio, airport, heavy kits | Awkward on stairs and rough ground | Use dividers and rigid cases, keep heavy items from sliding |
The right bag style will not fix a bad layout, but it does change how much time you spend digging around. If I work on foot, I care more about access and balance than raw capacity. Once the format fits the job, the next step is avoiding the packing mistakes that quietly waste space or damage gear.
Avoid the mistakes that waste space or damage gear
When a camera bag feels chaotic, the problem is usually not the bag itself. It is one of a handful of packing mistakes that I see over and over: too much gear, too little separation, and no clear idea of what needs to be reached first.
- Packing for every possible shoot. The bag gets heavy, and the gear you actually need becomes harder to reach.
- Leaving empty space around lenses. A lens that can shift will eventually hit something.
- Mixing small accessories together. Cards, batteries, caps, and cables belong in separate pockets or cases.
- Putting chargers or hard adapters against glass. One rough stop in transit is enough to cause scratches or pressure points.
- Forgetting to test the layout. I always check whether I can grab the body, swap a lens, and close the bag with one hand.
- Not resetting the bag after the shoot. A bag packed in a hurry usually stays messy until it causes a problem.
Once you remove those mistakes, the bag becomes much easier to trust. The final step is building a reset routine so the next shoot starts from a clean layout instead of a half-remembered scramble.
Use a reset routine that makes the next shoot easier
I keep a short reset routine because it is faster than trying to remember what I used last time. The goal is not perfection; it is making sure the bag is ready, the missing pieces are obvious, and the most important gear starts charged and capped.
- Remove trash, used wipes, and anything that should not live in the bag.
- Return every lens cap, body cap, and battery to its normal place.
- Check memory cards, battery charge, and cable placement.
- Dry the bag if it picked up rain, dust, or condensation.
- Lay out the next day’s core kit before zipping it shut.
If you pack the same way every time, the bag stops feeling like a black hole and starts working like a tool. That consistency is what keeps your camera gear safe, speeds up your workflow, and makes the next shoot feel easier before you even leave the house.
