
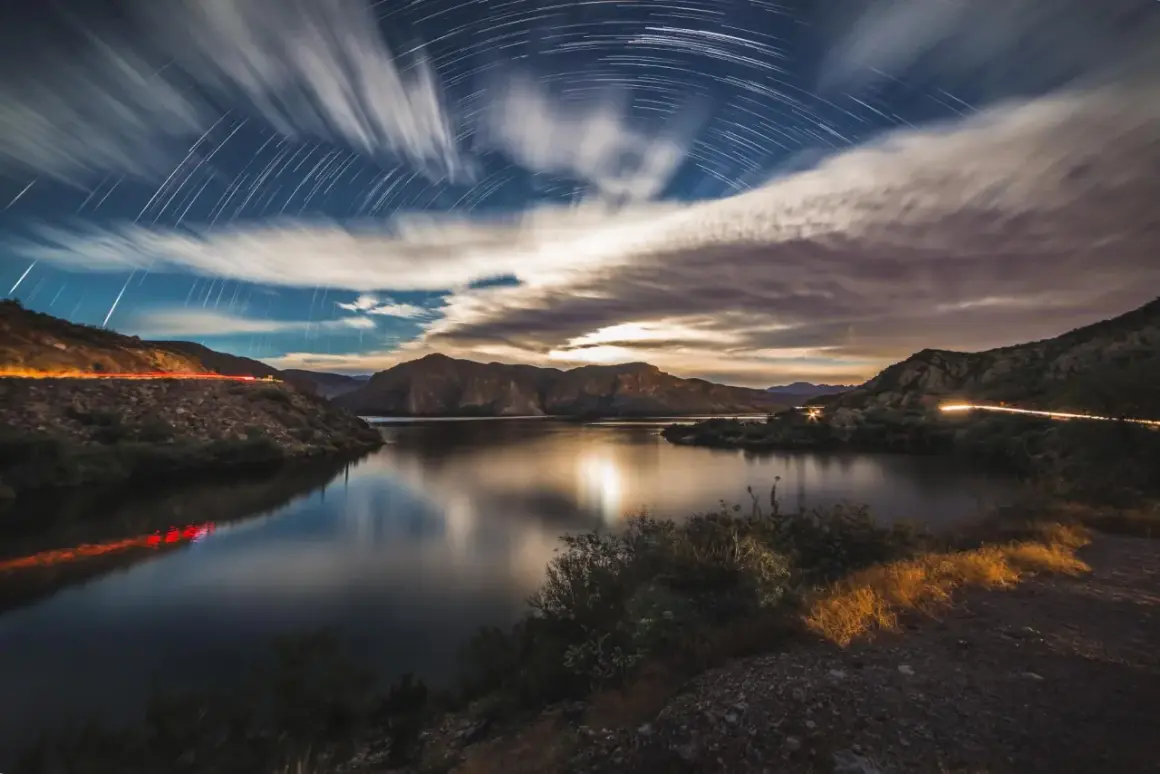
A moon landscape works best when the scene has a clear job: sometimes the moon is the subject, sometimes it is the light source, and sometimes it is the detail that gives the foreground scale. In this article I focus on the styles, subjects, planning choices, and camera settings that make moonlit photography feel intentional instead of accidental. I also cover the mistakes that usually flatten the image, especially when the moon is bright and the land is dark.
Key points that shape a strong moonlit frame
- Decide first whether the moon, the landscape, or their relationship is the real subject.
- Moonrise and moonset near twilight usually give the best mix of color, detail, and atmosphere.
- For the moon itself, a low ISO and a starting point around f/8 to f/11 keeps detail manageable.
- For the land, a tripod and bracketed exposures often matter more than a faster lens.
- Foreground anchors such as ridges, trees, water, or buildings help the moon feel scaled and believable.
- Editing should recover tone and contrast, not invent a brighter scene than the camera actually saw.
What makes a moonlit scene read well
The strongest moon images are built on three things: contrast, scale, and timing. The moon is sunlit, so it is much brighter than the foreground at night, which means one exposure often struggles to hold both the sky and the land with equal clarity. That is why I treat moon photography less like pure night work and more like a balancing act between daylight-style exposure and low-light atmosphere.
What usually helps most is a clear relationship between the elements in the frame. A bare moon against black sky can be clean, but it is rarely memorable unless the texture or phase is special. Add a ridge line, a coast, a tree, or a roofline, and the image gains context immediately. Thin clouds can also improve the result by softening the moon’s edge and giving the sky texture instead of emptiness.
Another detail people underestimate is timing around the horizon. When the moon is low, it can appear larger because of perspective and the visual cues around it, and the atmosphere may warm the tone slightly. That combination often looks more cinematic than a moon hanging high and isolated in the sky. Once you understand those relationships, the next step is choosing the style that fits the story you want to tell.
Styles and subjects that suit the moon
I usually decide on the style before I decide on the lens. The same moon can produce very different photographs depending on whether the goal is scale, mood, drama, or a near-graphic silhouette. In practice, the subject choice matters just as much as the equipment.
| Style | Best subjects | Why it works | Main risk |
|---|---|---|---|
| Wide moonlit landscape | Coastlines, mountain ridges, dunes, lakes | It shows the moon as part of a larger place, not a floating object | The moon can become too small if the composition lacks a strong foreground |
| Silhouette-driven scene | Lone trees, cabins, towers, hikers, lighthouses | The subject shape gives the frame instant readability and scale | Too many dark shapes can turn the photo into clutter |
| Compressed telephoto scene | Distant peaks, skylines, layered hills, bridges | Compression makes the moon feel closer to the land and visually larger | Atmospheric haze can soften detail fast |
| Minimalist moon scene | Empty shoreline, snowfield, open desert, quiet road | Negative space creates a calm, deliberate image | The frame needs discipline, because there is nowhere for weak composition to hide |
If I want the image to feel cinematic, I look for one strong shape and one clear horizon. If I want it to feel intimate, I move closer to a single subject and let the moon act as a subtle cue instead of a giant centerpiece. Both approaches work, but they require different decisions about focal length and spacing, which leads directly into planning.
How I plan the shot before dark
Planning matters more than luck here. Moonrise and moonset change by date and location, and the moon does not rise in the same place every night. I check its direction, altitude, and timing before I leave, because a scene that looks perfect on a map can fail completely if the moon appears behind the wrong ridge or outside the frame.
Canon’s guidance to work one to three days before or after the full moon is genuinely practical when you want twilight color and a visible horizon. The full moon itself can be too late for that soft transition, while the days just around it often give you a better balance of glowing sky and usable foreground detail. In many cases, that small shift in timing improves the photo more than a more expensive lens would.
I also separate two different goals. If I want detail in the moon, I plan for a relatively short exposure and a low ISO. If I want the landscape to hold texture, I plan for a longer exposure, or I plan to blend two or three frames later. Those are not the same problem, and treating them as one is where many people get stuck.
- For moon detail, work from a bright, clear night and expect shorter shutter speeds.
- For color in the sky, aim for the hour around moonrise or moonset rather than the middle of the night.
- For foreground texture, leave room for a second exposure if the scene is too dark for one clean frame.
- For alignment shots, arrive early, because a few minutes can change the moon’s position enough to break the composition.
Once the timing is set, the next question is whether your camera settings support the scene or fight it.
Camera settings that keep the moon and landscape usable
For the moon itself, NASA’s Looney 11 rule is a useful starting point: set the aperture around f/11 and keep ISO and shutter speed matched as a baseline. In simple terms, that gives you a controlled exposure for a bright lunar surface without washing out the detail. I still treat it as a starting point, not a rule carved in stone, because haze, lunar phase, and focal length all change the result.
For a moonlit landscape, I usually work with a different mindset. The scene may need a wider aperture and a slower shutter if the foreground is part of the story, but I still try to stay as low in ISO as I can. Tripod stability matters here more than almost anything else. A remote release, self-timer, or electronic shutter helps too, because even slight vibration can ruin a sharp moon edge.
| Goal | Starting settings | Gear note |
|---|---|---|
| Crisp moon detail | ISO 100 to 200, f/8 to f/11, 1/125 to 1/250 sec | Telephoto lens, tripod, manual focus |
| Balanced moonrise landscape | ISO 100 to 400, f/4 to f/8, 1/2 to 2 sec | Wide or standard lens, bracket 2 to 3 frames |
| Foreground-first night scene | ISO 800 to 3200, f/2.8 to f/5.6, 2 to 15 sec | Tripod, remote release, watch for motion blur in clouds or water |
I keep a few habits non-negotiable: manual focus, RAW capture, and a clean lens. If the focus is soft, no amount of editing will rescue the shot. If the sensor is dirty, the moon will make every dust spot obvious. And if the battery is weak, night shooting gets cut short at exactly the wrong moment. These are simple things, but they decide whether the frame survives the field.
Composition choices that make the frame feel deliberate
The moon is powerful, but it should not automatically become the center of every photograph. I rarely place it dead center unless symmetry is the point of the image. More often, I use it as an anchor that supports a foreground shape, a leading line, or a reflection. That gives the eye a route through the frame instead of letting it stop at a bright circle in empty space.
A few composition choices make a real difference:
- Use a strong foreground, such as rocks, grass, a shoreline, or a rooftop edge.
- Keep the horizon purposeful; low if the sky matters more, higher if the land carries the story.
- Use telephoto compression when you want the moon to feel closer to the subject.
- Let silhouettes stay simple; one tree or one tower usually works better than a crowded outline.
- Try reflections on water, wet sand, or glassy snow if you want a second bright element in the composition.
One overlooked move is to look for an object that explains scale. A hiker, boat, cabin, or distant building can keep the image from feeling abstract. It is the difference between a pretty sky and a scene that feels inhabited. Once the composition is in place, editing has a much easier job.
Editing that keeps the scene believable
Good editing in moon photography should feel almost invisible. I want the viewer to believe the light, not admire the software. That usually means recovering highlights in the moon, lifting shadows carefully in the land, and preserving a natural gradient in the sky. When the sky turns too blue or the moon turns into a white cutout, the photo stops feeling like a place and starts feeling like a composite, whether it was one or not.
If I blend exposures, I keep the transition honest. The moon and the land often need separate treatment because their brightness levels are so far apart, but the blend should still respect the direction of light and the edge of the horizon. Haloing around ridgelines is the first sign that the edit went too far. So is a foreground that looks brighter than the moonlight would realistically allow.
- Reduce highlights first so the moon keeps edge detail.
- Lift shadows selectively, not globally, or the whole frame turns flat.
- Use modest noise reduction in the dark areas, because overdoing it smears texture.
- Warm the horizon slightly when the moon is low, then cool the upper sky if needed.
- Sharpen the moon separately if your editor allows local adjustments.
Editing should finish the story, not rewrite it. When the tone is believable, the image feels stronger for a longer time, which is usually the real test of a good moon photograph.
The small checks that save a night shoot
Before I leave, I run through a short list that saves more images than any preset ever has. It is not glamorous, but it prevents the usual regrets: the empty battery, the missed moonrise, the locked gate, the fogged lens, or the composition that never quite lined up because I arrived too late.
- Moonrise time and direction checked against the exact location.
- Cloud cover, humidity, and haze reviewed before driving out.
- Tripod, remote release, charged batteries, and empty memory cards packed.
- Lens cloth, red-light headlamp, and spare layers ready for the cold.
- Access hours confirmed, especially for overlooks, parks, and roadside pull-offs in the U.S.
- One backup composition chosen in case the primary alignment fails.
If I could leave you with one practical rule, it is this: treat the moon as part of the scene, not the whole scene. Once the foreground, timing, and exposure are working together, the photograph stops looking like a technical exercise and starts looking like a place you could stand in for a moment.
