
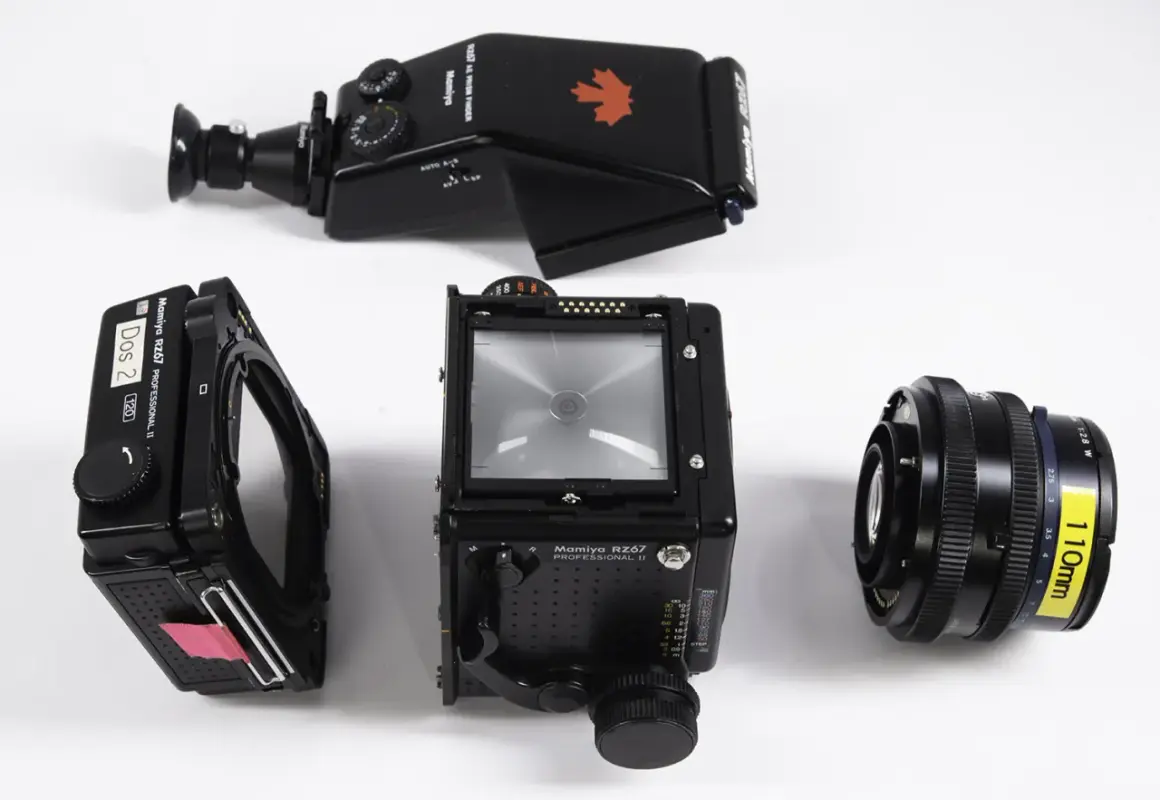
The Mamiya RZ67 is a 6x7 medium-format SLR that rewards slow, controlled shooting with big negatives, a rotating back, and a modular system built for studio work. In practice, that means excellent portrait and product results, but also real weight, a battery-dependent body, and a workflow that asks you to think before every frame. This guide breaks down how the system works, what to buy first, where it shines, and where it is simply too much camera.
The essentials that shape whether this camera fits your work
- It shoots 6x7 frames on 120 film, so you get 10 exposures per roll.
- The revolving back keeps portrait and landscape framing fast without turning the whole camera.
- It is modular, so backs, finders, and lenses all change how it behaves.
- A body, waist-level finder, 120 back, and 110mm lens weigh about 2,490 g.
- The shutter is electronic, but there is an emergency mechanical mode at roughly 1/400 sec.
- The camera makes the most sense when image quality matters more than speed or portability.
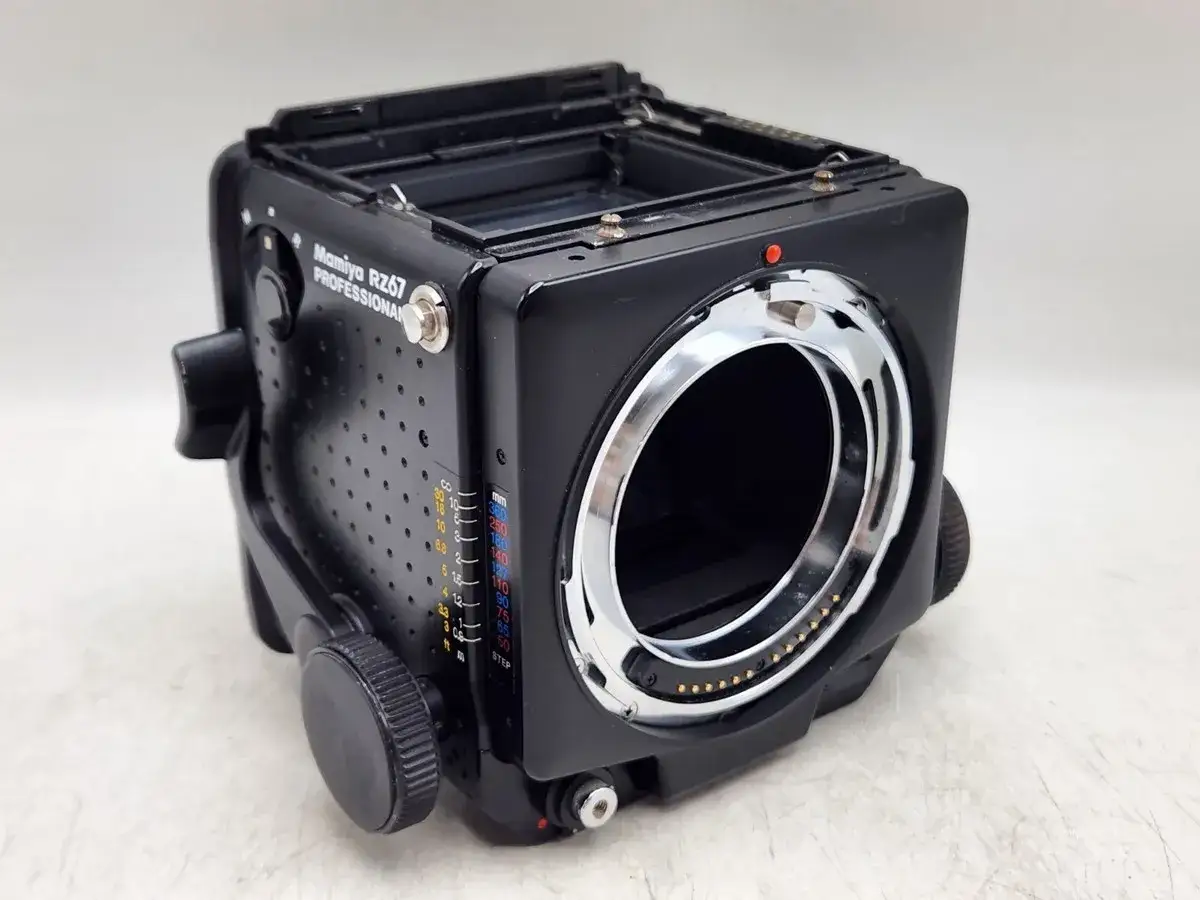
How the modular system changes the shooting experience
What makes this camera different is not just the negative size. It is the fact that the body, finder, lens, and back all work as separate parts of one system. That sounds obvious until you use it in the studio and realize how much easier it is to swap a back, change a finder, or rotate the frame without changing your position.
The revolving back is the signature feature. Instead of twisting the whole camera for portrait orientation, you rotate the film back and keep your composition, tripod balance, and lighting setup intact. For portrait work, that is not a gimmick. It saves time, preserves your framing, and makes the camera feel more like a studio tool than a field camera.
The other practical advantage is flexibility. You can work with a waist-level finder for a more deliberate, ground-level viewing experience, or use an eye-level AE prism if you want metering support and a more conventional shooting stance. The manual notes that the standard setup includes the waist-level finder, while the AE prism adds average, spot, and auto-shift metering.
Film backs are equally important. The system supports 120 and 220 6x7 backs, a 6x4.5 back, Polaroid options, and later digital-back workflows. On paper that sounds like accessory overload; in real use it means the body can adapt to different jobs instead of forcing you into one format. The dark slide and twin frame counters make the back system workable, but they also add discipline. If you forget the slide, the camera will remind you very quickly.
That modularity is the reason the camera still feels serious rather than nostalgic, and it leads directly to the biggest decision most owners face: which lens and back combination actually deserves space in the bag.
The lenses and backs that matter most
When people talk about this system, they often jump straight to the famous portrait look. I think that misses the point. The real strength is that the lens lineup covers different working distances and different subjects without making the camera feel like a compromise. If you choose the wrong starting combination, though, the system can feel heavier and slower than it needs to be.
| Option | Best for | Why it matters | Main tradeoff |
|---|---|---|---|
| 90mm f/3.5 | General use, environmental portraits, all-purpose shooting | A balanced starting point if you want one lens that can do a lot | Less subject compression than longer lenses |
| 110mm f/2.8 | Portraits, close framing, shallow depth of field | The classic look many people want from the system | Less flexibility for wider compositions |
| 180mm f/4.5 | Headshots, tighter portrait framing, more working distance | It is the lens I would choose when I want flattering compression and separation | Needs more room and a steadier support setup |
| 120 6x7 back | Most shooting | Practical default, with 10 exposures per roll | Film economy is limited compared with smaller formats |
| 6x4.5 back | More frames per roll, portrait sessions, faster workflow | Gets you 15 exposures on 120 | Smaller negative area |
| 220 back | Special situations | Can double the frame count on paper | Less useful unless you already have a real reason to run 220 |
For most photographers, the safest starting point is simple: one 120 back and one lens. If I were building a kit from scratch today, I would choose the 110mm first for portraits or the 90mm first for a more general-purpose setup. The 180mm is the lens I would add when I already know I want more working distance and a tighter portrait style.
The later Pro D bodies added digital-back communication, which matters only if you truly plan to hybridize the system. Otherwise, the smartest move is still to keep the kit lean and learn one lens well before expanding.
What it is like to use in the real world
This is not a camera that rewards haste. The body is large, the negative count is low, and every step in the process takes longer than it does on a smaller format camera. That is not a flaw by itself, but it does mean you should approach it with the right expectations.
Here is the working rhythm that usually makes sense:
- Check the battery before the shoot, because the body does not function properly without one.
- Confirm the dark slide is out before you try to release the shutter.
- Advance the film with even strokes, because the manual warns that rushing can affect frame spacing.
- Use a tripod or a very stable handhold if sharpness really matters.
- Lock focus once it is set, especially for portraits or close work with bellows extension.
The camera can still shoot at approximately 1/400 sec in emergency mechanical mode if the battery is dead, but that is a fallback, not a normal operating style. The normal shutter range is 8 sec to 1/400 sec with intermediate settings, and the leaf shutters in the lenses allow flash synchronization at all speeds. That combination is a big reason the system has stayed relevant for studio lighting: it is controlled, predictable, and very good at what strobes need.
Where people get tripped up is assuming the camera is slow only because it is old. In reality, it is slow because the workflow is deliberate. Once you accept that, the camera stops feeling awkward and starts feeling dependable.
How it compares with RB67 and lighter medium-format options
If you are choosing between systems, the most useful comparison is not prestige. It is workflow. The RZ body gives you more electronic convenience, the RB gives you mechanical simplicity, and a 645 system gives you mobility and more frames per roll. None of those choices is universally better.
| System | Best fit | Main advantage | Main tradeoff |
|---|---|---|---|
| RZ67 | Studio portraits, product work, controlled light | Rotating back, modular workflow, electronic features, strong flash compatibility | Heavy, battery dependent, slow to handle |
| RB67 | Photographers who want the same format with fewer electronic dependencies | Mechanical simplicity and a very direct feel | Less convenience in metering and automation |
| 645 system | Location work, travel, faster-paced sessions | More frames per roll and easier carry | Smaller negative and less of the 6x7 look |
I would choose this system when the shot count is low and the stakes are high. I would choose 645 when I need to move, react, and keep shooting without thinking about every frame. The RB sits in the middle for people who want the format but prefer a more mechanical camera.
What I would inspect before buying used gear
Used examples can be excellent, but only if the system is complete and mechanically healthy. Cosmetic wear is not the real issue. Missing accessories, bad contacts, or a sticky film back will cost more time and money than a body with honest scuffs.
- Battery compartment and contacts should be clean, because the body depends on power for normal operation.
- Finder behavior should be checked, especially if the AE prism is included.
- Shutter release and cocking action should feel consistent, not gritty or vague.
- Film back rotation should move smoothly and lock securely in both orientations.
- Dark slide and frame counter should function correctly, since they protect the roll and prevent mistakes.
- Lens shutter performance matters more than exterior condition, because the system lives or dies on the lens side of the equation.
In the current U.S. used market, asking prices vary a lot with condition and included accessories. Rougher bodies can land in the low hundreds, cleaner bodies with finders and lenses move much higher, and complete kits can climb close to four figures very quickly. That is why I tell people not to buy the first listing they see. Compare condition, accessories, and service risk before you compare the sticker price.
If you are buying for actual use rather than collecting, I would rather have a clean body with one dependable lens and one working back than a prettier kit with unknown issues.
The setup that makes the most sense for most shooters
For most photographers, the best entry point is boring in the best possible way: one body, one 120 back, one finder, and one lens. That keeps the learning curve manageable and lets you find out whether the camera’s pace works for you before you start chasing accessories.
- For portraits, start with the 110mm f/2.8.
- For a broader starting point, choose the 90mm.
- For tighter framing and more subject separation, move to the 180mm later.
- Skip 220 unless you already have a real use case for it.
- Carry a spare battery and treat the dark slide like part of the shutter sequence, not an afterthought.
The camera rewards precision, and that is exactly why it still holds up. If you want a medium-format system that encourages careful framing, deliberate metering, and a portrait-first workflow, it remains one of the most satisfying tools in the film world. If you want speed, light weight, or casual all-day carrying, it will feel like overkill almost immediately.
