
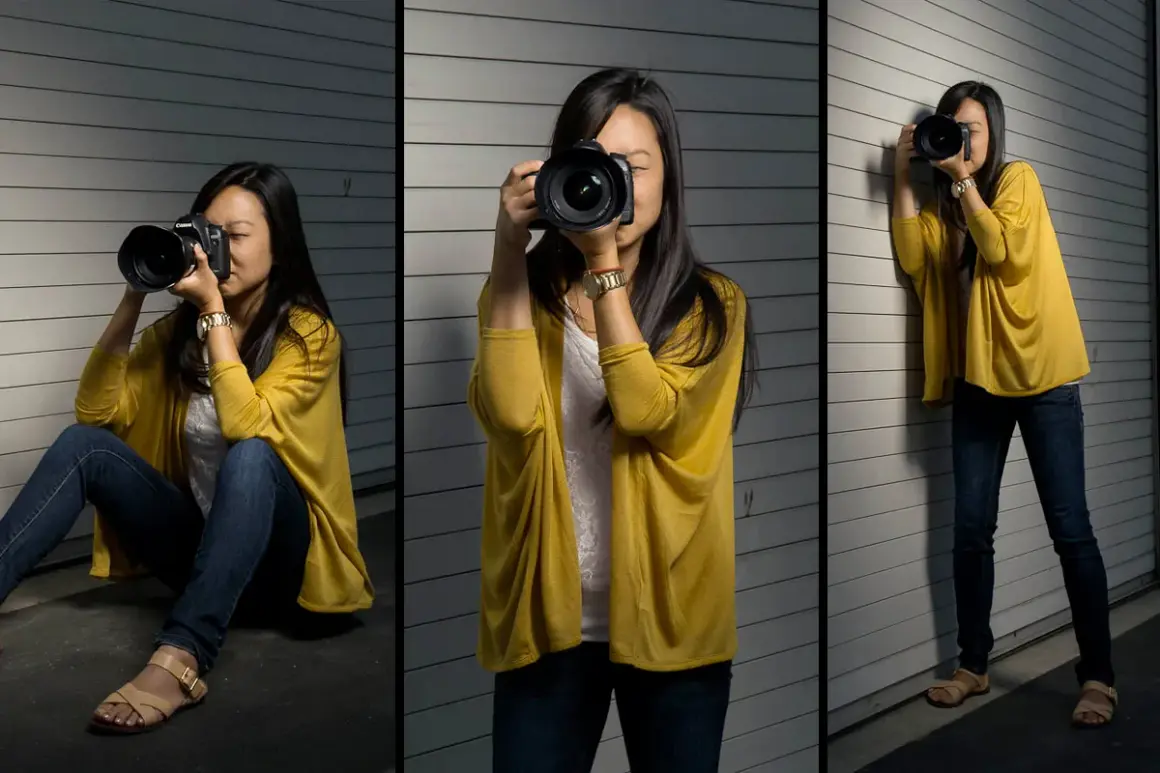
Sharp handheld photos usually come down to leverage, balance, and a calm trigger finger. In practice, learning how to hold a camera is less about forcing your body into a stiff pose and more about building a stable triangle between your hands, torso, and lens. That small adjustment matters whether you are shooting a portrait on a mirrorless body, a street frame on a DSLR, or a quick clip on a phone.
The essentials for a steadier handheld shot
- Two hands beat one almost every time, with the left hand carrying most of the lens weight.
- Keep the camera close to your body so your arms are not acting like long levers.
- Use your stance and breathing to reduce movement at the moment you press the shutter.
- Match the hold to the gear because a small mirrorless body, a DSLR, and a long zoom do not balance the same way.
- Use support tools when needed because stabilization helps, but it does not cancel physics.
Start with the grip, not the shutter
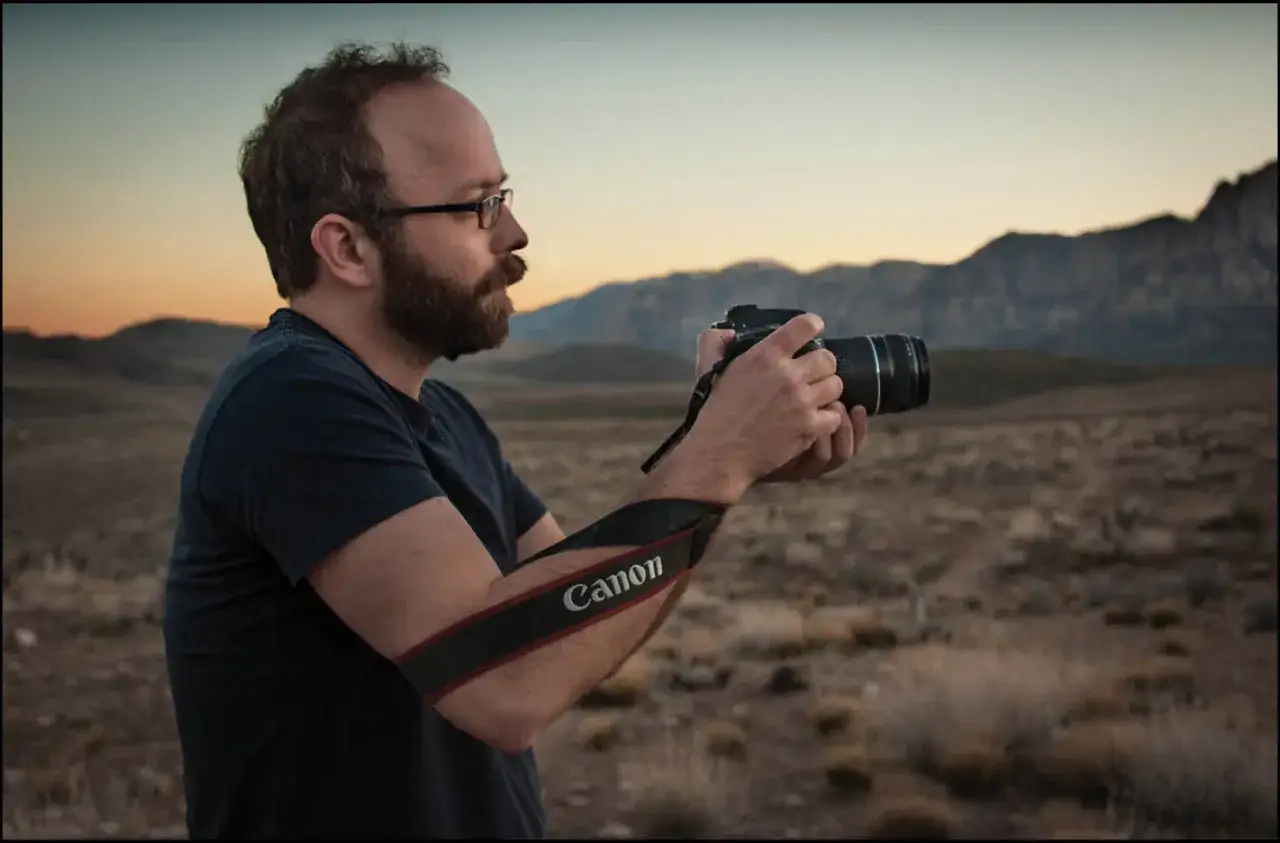
The camera should feel supported before you even think about pressing the button. I usually treat the right hand as the control hand and the left hand as the support hand, because that split keeps the body from fighting the lens. A relaxed grip is better than a tight one; tension travels into the wrists and makes the frame twitch.
Right hand
Wrap the grip firmly without squeezing hard. Your index finger should rest on the shutter release, your thumb should stay ready for the rear dial, and your wrist should stay straight rather than bent upward. The goal is control, not force.
Left hand
Place your left palm under the lens or under the camera body where the weight naturally settles. With a heavier zoom, move that hand closer to the center of gravity or onto the lens collar if there is one. That position does more for stability than holding the side of the camera ever will.
Once the grip is balanced, the rest of your body can do its job instead of compensating for a bad hold. That is where stability starts to feel repeatable rather than accidental.
Use your body as a stabilizer
Your arms are only one part of the support system. I get the most reliable results when I stand with my feet about shoulder-width apart, one foot a half-step forward, knees soft, and elbows gently tucked against my ribs. From there, I bring the camera to my face or chest instead of extending it away from my body; the closer the weight stays to your center, the less it can sway.
Read Also: Olympus Pen FV Guide - Is This Half-Frame SLR Right For You?
The viewfinder gives you a third point of contact
When I can use the viewfinder, I do. The eyecup against your brow adds a third contact point, which is why a DSLR or mirrorless body often feels steadier through the finder than from the rear screen. If you do need the screen, keep the camera close to your torso and move the screen only as far as needed to compose.
Breathing matters too. I usually take the frame on a natural pause after exhaling, not after holding my breath until my shoulders tighten. That tiny timing choice reduces shake right when it matters most.
Those habits change a bit when the camera turns vertical or the lens gets much heavier, so the next step is matching the hold to the specific setup.
Adjust the hold for different cameras and shooting positions
There is no single grip that works perfectly for every body and lens combination. The camera body, lens length, and shooting angle all change where the weight sits, so I adjust my hold rather than forcing one position everywhere.
| Setup | Best hold | Why it works | Main tradeoff |
|---|---|---|---|
| DSLR with a kit or standard zoom | Right hand on the grip, left hand under the lens, face against the viewfinder | Balanced and familiar; the finder adds another contact point | Can feel bulky in tight spaces |
| Mirrorless body | Same two-hand hold, but let the left hand do more of the support | Smaller bodies often need extra support from the lens side | Easy to underestimate how shaky a lighter body can be |
| Portrait orientation | Rotate your whole body, keep elbows close, and avoid twisting at the waist | Whole-body rotation is steadier than arm-only rotation | Less comfortable if you stay vertical too long |
| Long telephoto lens | Support near the center of gravity or lens collar, with the camera braced to your face | Controls front-heavy weight and reduces forward droop | Arm fatigue arrives sooner |
| Small compact camera or phone | Two hands, elbows in, device close to the body | Less mass means small movements show up more clearly | It is tempting to shoot at arm’s length, which is usually less stable |
In portrait orientation especially, I prefer moving my feet and turning my torso over rolling the camera in my hands. That keeps the frame steadier and saves the wrists from doing all the work.
Once you know where the camera should sit, the next question is when your hands stop being enough and gear should take over.
Choose gear that supports your hold instead of fighting it
There is a practical limit to what good technique can do. A useful starting point for handheld work is the old reciprocal rule: aim for a shutter speed around the focal length of the lens, so roughly 1/50 second with a 50mm lens and 1/200 second with a 200mm lens on a full-frame camera. Crop-sensor bodies usually need a faster starting point, and stabilization can let you go a bit slower, but it does not freeze a moving subject.
That is where gear earns its keep. I like to think of it as a ladder: the better my hand position, the less I need support gear, but once the shutter gets slow or the lens gets long, I stop pretending technique alone will solve it.
| Gear | Best use | Why it helps | Tradeoff |
|---|---|---|---|
| Tripod | Slow shutter speeds, landscapes, portraits, product work | Removes body movement from the equation | Slower to set up and less mobile |
| Monopod | Events, sports, and heavier telephoto lenses | Gives one strong point of support without full tripod bulk | Less stable than a tripod |
| IBIS or OIS | Handheld shooting in lower light | In-body image stabilization and optical image stabilization reduce small shake | Helps with camera movement, not subject motion |
| Camera strap | Travel, street work, and long sessions | Adds security and can be used as a light tension point | Not a replacement for a real support position |
| Remote release or self-timer | Any shot where the camera must stay still during exposure | Removes the small bump that comes from touching the shutter | Slower for fast-moving scenes |
I see a lot of people overestimate stabilization and underestimate subject motion. If the shutter is slow and the subject is moving, the best hold in the world will not rescue the frame. Gear extends what your hands can do, but it does not change what the scene itself is doing.
The mistakes that create shake even when your grip looks right
A lot of blur starts with a hold that looks fine from a distance but falls apart under pressure. The fixes are simple, which is why they are easy to ignore.
- Flared elbows turn your arms into two loose struts. Tuck them in and the camera becomes much easier to brace.
- Death-grip wrists make the frame tense and unstable. Firm is enough; rigid is not better.
- Jabbing the shutter shakes the camera at the exact wrong moment. Press smoothly instead of poking at it.
- Shooting too far from the body gives the lens more room to wobble. Bring the camera closer whenever composition allows.
- Confusing camera shake with subject motion leads to the wrong fix. A steadier hold cannot freeze a walking person or a moving car.
Once those habits are out of the way, the whole process gets cleaner. The last thing I rely on is a short routine that turns the technique into muscle memory.
A quick pre-shot routine I rely on before pressing the shutter
- Plant your feet shoulder-width apart and set one foot slightly forward.
- Set the left hand under the lens or body so the weight is supported, not pinched.
- Bring the camera in close and use the viewfinder or keep the screen tight to your torso.
- Relax your shoulders, exhale once, and take the shot on the natural pause.
- Press the shutter smoothly, then keep the camera still for a moment after the exposure.
I use that sequence because it is fast enough for real shooting and simple enough to repeat all day. The point is not to look textbook-perfect; it is to make the camera feel like an extension of your body so you can pay attention to light, timing, and framing instead of fighting shake. Once that hold becomes automatic, sharper images stop feeling like luck and start feeling like a habit.
