
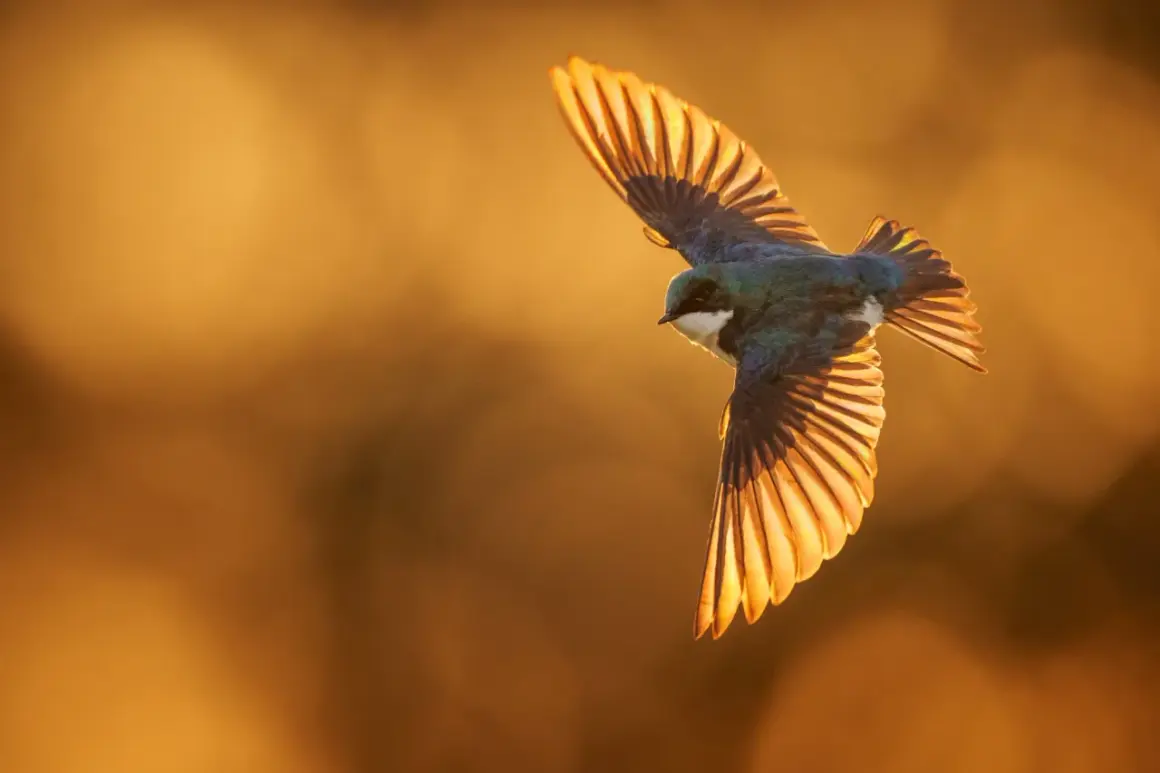
Bird in flight photography rewards preparation more than luck. The sharpest frames usually come from a repeatable system: a shutter speed that matches the bird’s movement, autofocus that can keep up, a clean background, and a shooting rhythm that follows the subject instead of fighting it. In this guide, I break down the settings, field technique, and editing choices that make fast-moving birds far easier to capture well.
The fastest way to improve your flight shots
- Use continuous autofocus with a wide or zone tracking area, then keep the bird under your active point.
- Start around 1/1600s to 1/2500s for most birds, and push faster for small, erratic fliers.
- Manual exposure with Auto ISO is usually the most stable setup when the background keeps changing.
- Longer lenses, smooth body movement, and good timing matter more than burst rate alone.
- Early morning and late afternoon usually give softer light, cleaner color, and easier subject separation.
Why most flight shots fall apart
Most misses come from the same four problems: motion blur, autofocus drift, messy backgrounds, and exposure swings. The hard part is that all four can happen at once, which is why this genre feels frustrating until your setup becomes automatic.
I see beginners blame the lens first, but the usual issue is a mismatch between the bird’s movement and the way the camera is being used. If the shutter is too slow, the wings smear. If the autofocus area is too loose, the camera grabs reeds, water, or sky instead of the bird. If the background is busy, even a sharp bird can look weak because the frame has no visual breathing room.
The other thing that trips people up is scale. When the bird is small in the frame, every tiny error becomes obvious. A slight focus miss that might be acceptable in portrait work looks much worse when the subject is moving at speed. Once you understand those failure points, the next step is choosing a setup that reduces them instead of adding more variables.
The gear and settings that actually help
You do not need the most expensive camera to get strong results, but you do need a body that autofocuses quickly, a lens with enough reach, and a setup that lets you react without fighting menus. In practice, that usually means a telephoto lens in the 300mm to 600mm range on full frame, or an equivalent range on APS-C. For larger birds, 300mm can be enough. For smaller birds, 400mm to 600mm is far more practical.
I also prefer handheld shooting for most bird-in-motion work because it gives me the freedom to follow unpredictable paths. A monopod helps if you are carrying a heavy lens for long periods, while a tripod only really makes sense when the flight path is predictable or you are working from a fixed hide.
| Bird behavior | Shutter speed | Aperture | What I’m aiming for |
|---|---|---|---|
| Large gliders and soaring birds | 1/1250s–1/1600s | f/5.6–f/8 | Enough speed to freeze steady wingbeats without forcing ISO unnecessarily high. |
| Most ducks, gulls, herons, and raptors | 1/1600s–1/2500s | f/4–f/7.1 | A balanced starting point for everyday flight sequences. |
| Fast wingbeats and abrupt turns | 1/2500s–1/4000s | f/4–f/6.3 | Sharper wing edges and a better chance of stopping motion cleanly. |
My default exposure setup is usually manual mode with Auto ISO. That keeps exposure more consistent when the bird crosses sky, water, and land in the same sequence. Shutter Priority can still work well if the light is changing fast, but it may shift aperture in ways you do not want. Aperture Priority is fine in even light, yet it is less predictable when the background alternates between bright sky and darker vegetation.
A practical starting point is to keep Auto ISO capped somewhere around 3200 or 6400, depending on how clean your camera looks at higher sensitivity. If you are shooting RAW and your sensor handles noise well, 6400 is often usable. If your files get noisy quickly, a lower cap forces you to work more carefully with light and timing. The next challenge is getting the camera to lock onto the bird instead of the scene around it.
How to track focus without fighting the camera
For moving birds, I want continuous autofocus, not single-shot focus. On most cameras that means AF-C or a similar tracking mode. Back-button focus is also useful because it separates focusing from the shutter release, which gives me more control when a bird enters the frame, changes direction, or passes behind a brief obstruction.The autofocus area matters just as much as the mode. A single point or a small zone is more reliable when the background is cluttered, while subject detection or a wider tracking area can be excellent against open sky or water. If your camera keeps grabbing branches, reeds, or highlights in the water, the answer is usually to tighten the AF area rather than to abandon tracking altogether.
When a smaller AF area helps
I switch to a smaller focus area when the bird is moving through trees, marsh grass, docks, or shoreline clutter. That gives the camera less freedom to chase the wrong subject. It is harder work because you need to keep the point on the bird, but it is often the better choice when the scene is busy.
Read Also: Architectural Photography - Master Light, Perspective & Pricing
When subject detection helps more
Subject detection is most useful when the bird is isolated against a clean background and the flight path is reasonably clear. In those conditions, modern tracking can do more of the heavy lifting. I still keep my hands ready to intervene, because subject detection is a tool, not magic. If the bird turns sharply or the background becomes messy, I want enough control to steer the camera back on target.
Two habits make a bigger difference than most people expect. First, start tracking before you press the shutter, not after the bird is already in the perfect position. Second, follow through after the burst, just like a golfer or baseball hitter follows through after contact. If you stop moving the instant you fire, the frame is more likely to show motion blur or a slightly off-center subject.
I also prefer short bursts of 3 to 6 frames instead of holding the shutter down for a long sequence. Short bursts reduce buffer pressure, make culling easier, and force me to time the best wing position instead of hoping the camera will rescue the moment for me. Once the focus behavior is under control, the next variable that shapes the image is light.
Light and background decide whether the frame feels clean
Good bird photography is often about what sits behind the bird, not just the bird itself. A plain sky, open water, or distant shoreline gives the subject room to stand out. Reeds, trees, docks, and bright reflective patches create distractions that can ruin an otherwise solid frame.
Wind matters too. Many birds take off and land into the wind, so if you watch the wind direction, you often get a better idea of where the flight line will be. That helps me choose my position before the action starts instead of reacting after the bird is already airborne.
Light is just as important. Side light reveals feather texture and wing shape better than flat front light, while soft backlight can produce rim light or silhouettes if that is the look you want. Midday sun is usually harsher and less flattering because highlights on white feathers clip quickly and shadows go deep. Early morning and late afternoon tend to be more forgiving, especially for pale birds, because the color is softer and contrast is easier to manage.
When the bird is white or very bright, I watch the histogram and highlight warnings carefully. It is easy to overexpose feathers against a bright sky, and once detail is gone, no amount of editing will bring it back. If the sky is the wrong brightness, I would rather shift my position or wait for a better angle than force the exposure and hope to fix it later.
That light-and-background discipline leads naturally to composition, because a technically sharp frame still needs structure to feel intentional.
Composition choices that make motion feel intentional
In flight work, composition is really about direction and breathing room. A bird usually needs space in front of its movement, not behind it. If the subject is pushed tight to the edge of the frame with nowhere to go, the image can feel trapped even when the focus is sharp.
I also think in terms of wing position and body angle. A side profile shows shape clearly. A head-on pass feels more dramatic but is harder to track well. A banking turn is often the most satisfying because the wings, body, and direction all tell the same story at once. When I can anticipate a turn, I will often stay patient and wait for that moment rather than firing at every pass.
Background separation matters here too. A dark bird against a dark tree line needs a cleaner outline. A pale bird against a bright sky needs contrast and careful exposure. Sometimes the smartest move is to include a little environment if it supports the story, especially in wetlands, coastal scenes, or migration stops. The point is not to isolate the bird at all costs; it is to make the motion readable.
Once composition starts to feel more deliberate, the work on location becomes more efficient. That is where a simple field workflow helps a lot.
A field workflow that increases your keeper rate
- Watch the birds for a few minutes before shooting. I want to understand takeoff habits, approach lines, and where they tend to land.
- Set exposure and autofocus before the action starts. I adjust one thing at a time, not five.
- Choose a position with a clean background and a clear flight lane. If the scene is cluttered, I move rather than forcing the shot.
- Track the bird early, then fire short bursts only when the framing is right.
- Keep shooting through the pass. Some of the best frames happen just after takeoff or right before landing, not at the most obvious peak moment.
That workflow sounds basic, but it saves a lot of wasted motion. I would rather make 20 thoughtful attempts than 200 random frames. The goal is not volume; it is a higher percentage of frames where the bird is sharp, well placed, and understandable at a glance.
One mistake I see often is changing settings mid-sequence. If the bird is already in motion, I do not want to be spinning dials while the moment disappears. I build a reliable starting setup, then refine only when the light or behavior actually changes. That discipline makes the last stage of the process, editing, much easier.
Editing the keepers without making them look fake
My editing approach for flight images is simple: clean up the file without breaking the realism. I start with the RAW file, because it gives me more room to correct exposure and recover highlight detail in feathers. From there, I crop for direction and balance, not just for size.
Noise reduction matters when ISO climbs, but I keep it restrained. Too much smoothing makes feathers look waxy and removes the texture that gives the bird shape. Sharpening should also stay selective. I sharpen the subject enough to restore detail, but I avoid creating halos around the wings or making the background crunchy.
If the image has a slight sense of motion blur in the wings, I decide whether that blur helps the frame. Sometimes it does. A little blur can show energy and speed, especially in a dramatic banking turn. If the blur was accidental and the body is still soft, I usually move on. No edit can fully rescue a shot that missed focus on the important part of the bird.
I also clean up distracting spots only when they pull the eye away from the subject. A few tiny specks in a distant sky are not always worth touching. Over-editing often hurts flight images more than modest sensor noise ever will.
The three habits that improve flight work fastest
If I had to rebuild my results from zero, I would focus on three habits first: learn one location well, practice smooth tracking until it feels automatic, and choose a shutter speed I can trust before I worry about anything else. Those three choices improve consistency faster than buying another lens or spending hours buried in autofocus menus.
Once bird in flight photography stops feeling random, it becomes much easier to repeat. The camera still matters, but the bigger advantage comes from reading behavior, choosing a clean angle, and reacting with less hesitation. Start with common birds, keep the setup simple, and give yourself enough sessions to learn how the movement really looks before the shutter ever fires.
