
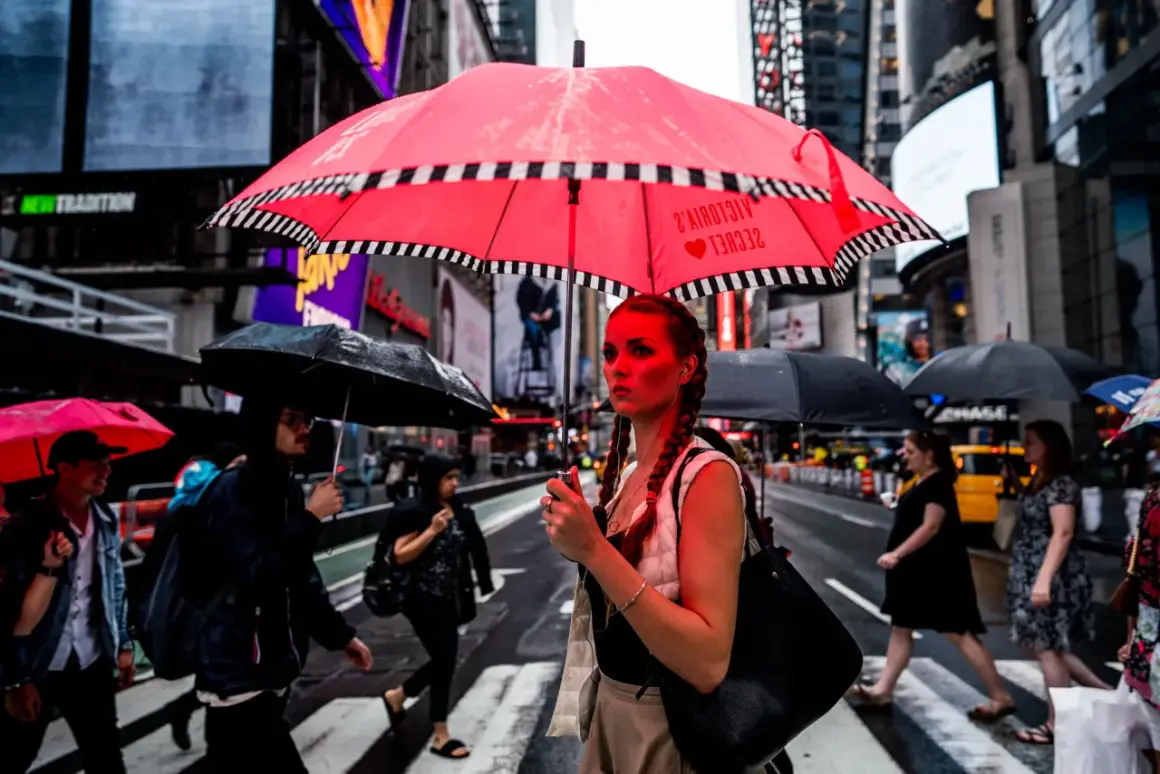
A 24mm lens gives street scenes room to breathe, but it also exposes every compositional mistake. 24mm street photography works best when you want context, motion, and the feeling of being inside the scene rather than observing from a distance. In this article I break down how the wider view changes composition, which settings make the lens easier to handle, and which filters are actually worth carrying.
The wide view works only when you control the edges and the subject distance
- On full frame, 24mm is a true wide-angle view; on APS-C it feels much closer to a normal documentary focal length.
- The lens rewards proximity, because the background becomes part of the story instead of just a backdrop.
- f/5.6 to f/8 and zone focusing make daytime street shooting fast and reliable.
- A slim clear filter can make sense in rough conditions, but a CPL is situational and an ND is mainly for motion blur.
- If your scenes feel too crowded, 35mm is often the cleaner alternative; if you want compression, 50mm is the better call.
Why a 24mm view changes the street story
A 24mm lens is wide enough to make a street feel alive without slipping into the exaggerated look of ultra-wide glass. On full frame, its roughly 84-degree angle of view lets you include storefronts, gestures, reflections, and passersby in one frame, which is why it works so well for layered scenes. I think the real strength is not just width; it is how much narrative you can keep around the subject without losing the subject itself.
The catch is distance. At 24mm, a half-step forward changes the picture more than many photographers expect, and that makes body position part of the composition. On APS-C, the same lens behaves closer to a classic documentary normal, which can make it easier to isolate a subject without giving up context.
How to keep the frame clean and readable
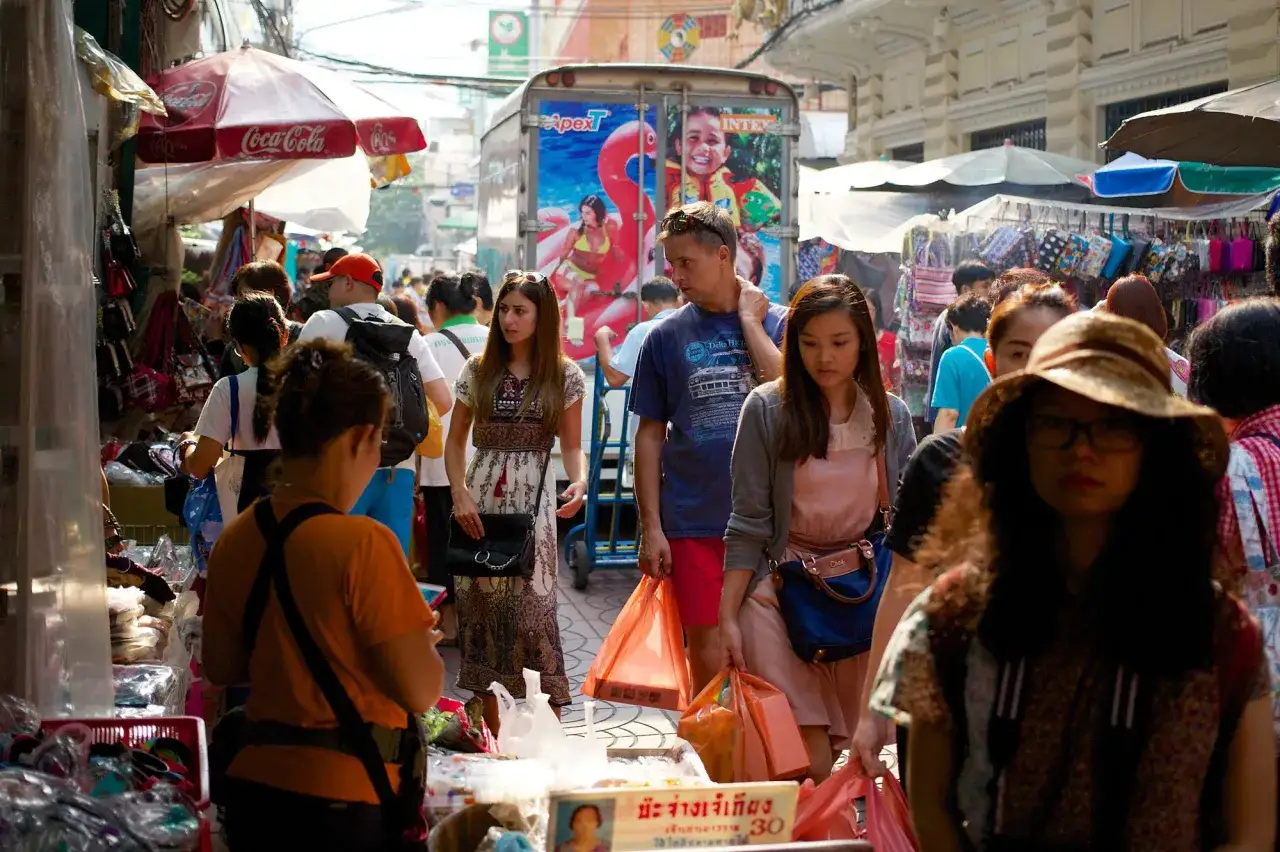
With a wide lens, the edges matter almost as much as the center. I try to treat the frame like a stage: the subject is the lead actor, but the background, reflections, signs, and people at the margins are what make the scene believable.
- Use foreground to create depth - A lamp post, bicycle wheel, doorway, or blurred passerby can anchor the image and stop it from feeling flat.
- Watch the frame edges - A bright arm, half-cut head, or distracting sign can hijack attention faster at 24mm than at 35mm.
- Think in layers - Foreground, subject, and background should each contribute something; if one layer adds nothing, reframe.
- Let the background do work - At 24mm, a good background is not decoration; it is part of the story.
- Use distance deliberately - Around 1 to 3 meters, or roughly 3 to 10 feet, the lens stays intimate without turning faces and hands into caricatures.
For close candid work, I usually stand still and let people enter the composition instead of chasing them with the camera. That keeps the scene calmer and reduces the nervous, over-corrected look that wide-angle street frames can get when the photographer keeps moving every second. When a frame feels weak, a small step left or right often matters more than any setting change.
Settings and focus habits that make 24mm easier to control
A 24mm lens is forgiving in one important way: depth of field is generous, so focus does not have to be perfect to get a usable street frame. That is why zone focusing still works so well here. Zone focusing means pre-setting focus to a distance range and shooting when the subject enters that zone, which is especially efficient when you are moving fast or working discreetly.
In bright light, I usually start around f/5.6 to f/8 and let the lens keep a broad slice of the scene sharp. In low light, I open up to f/1.4 to f/2.8 if the lens allows it, but I do not expect the same edge-to-edge cleanliness as at f/5.6. For shutter speed, 1/250s is a safe baseline for active street motion, while 1/60s to 1/15s is where I start if I want blur and atmosphere rather than frozen action.
| Street scenario | Starting point | Why it works |
|---|---|---|
| Bright daytime walk | f/5.6 to f/8, 1/250s or faster, auto ISO if needed | Deep enough focus for quick reactions and cleaner edges |
| Mixed light or shaded streets | f/2.8 to f/5.6, 1/250s, auto ISO | Lets you react quickly when light changes from block to block |
| Intentional motion blur | f/8, 1/15s to 1/60s | Holds the scene structure while people and traffic smear through it |
If I want a simple setup, I usually lean on aperture priority with a minimum shutter speed set high enough to protect moving people. If I want tighter control, manual exposure with auto ISO is the cleaner choice. Either way, the lens becomes much easier to live with once you stop treating focus as a last-second rescue and start using distance as part of the method. That leads directly to the question of filters, because on a wide lens extra glass can either help a lot or get in the way quickly.
Which filters actually help on a wide street lens
This is where people often buy more glass than they need. My rule is simple: if the filter does not solve a real problem in the field, I leave it off. Every extra layer can add flare, lower contrast, or make corner performance worse on a wide lens.
| Filter type | Best use | Main tradeoff | My take |
|---|---|---|---|
| Clear protective or slim UV filter | Dust, rain, sea spray, crowded environments | Can add flare or soften contrast if it is cheap or thick | Useful when the front element is truly at risk, especially if the filter is multi-coated and slim |
| CPL | Reflections in windows, wet pavement, car glass | Uneven polarization across a wide frame and about 1 to 2 stops of light loss | Niche on 24mm; I use it only when reflections are the subject |
| ND filter | Long exposures and daylight motion blur | Slower workflow, possible color shift, and more handling in the field | Worth it if you want blurred pedestrians or traffic without waiting for dusk |
A hood often does more for flare control than any filter, and it costs no light. If you do use a protective filter, I would keep it slim and multi-coated. On many 24mm lenses, thick filter stacks are what trigger corner vignetting sooner than expected, especially if you add a step-up ring or stack a CPL over another filter. I would also be cautious with variable NDs on still street work; they can introduce unevenness and artifacts that are hard to forgive on a wide frame.
When 24mm is the right call and when it is not
On full frame, 24mm is unapologetically wide. On APS-C, it lands closer to a comfortable documentary perspective, which can make it feel less aggressive and easier to use in tighter neighborhoods or indoor markets.
| Focal length | What it feels like | Best use | Main limitation |
|---|---|---|---|
| 24mm | Wide, immersive, context-heavy | Layered scenes, environmental portraits, energetic streets | Can get busy fast if the background is not controlled |
| 35mm | Balanced and classic | General street work, cleaner framing, easier subject isolation | Less dramatic scene context than 24mm |
| 50mm | Tighter and more selective | Compression, detail, discreet subject emphasis | Less room for environment and relationships between elements |
If your images keep feeling cluttered, moving up to 35mm is often the faster fix than forcing 24mm to behave like something else. If, on the other hand, you want to show how a person sits inside a place rather than separate them from it, 24mm usually earns its keep. The lens is not better in every situation; it is better when the story needs the surroundings as much as the subject.
The mistakes that make wide street frames feel messy
The biggest mistake is assuming the lens will organize the scene for you. It will not.
- Standing too far away and expecting the wide lens to create intimacy.
- Letting bright objects touch the frame edges.
- Shooting straight-on every time and ignoring angles.
- Using a CPL because it is already on the lens, not because reflections need control.
- Opening to the widest aperture in daylight when you actually need more depth and cleaner edges.
- Overcorrecting perspective in post until the image looks synthetic.
When a 24mm frame fails, it usually fails because the photographer left too much undecided, not because the focal length itself was wrong. The fix is almost always to move closer, simplify the background, or wait a few seconds for the scene to line up better. I see that as the real discipline of wide street work: the lens shows you what is there, but it also shows you exactly where you were careless.
The setup I would trust for a long street walk
If I were building one lean kit around a 24mm lens, I would keep it simple: a compact prime, a hood, and a slim clear filter only when the environment justifies it. I would shoot mostly around f/5.6 to f/8, keep auto ISO ready for changing light, and stay alert to the frame edges instead of treating them as an afterthought.
The real advantage of a wide street lens is not that it makes every scene look dramatic. It is that it gives you enough room to build a scene with layers, gesture, and context, which is exactly what strong street images need. If you respect that tradeoff, the lens stops feeling difficult and starts feeling precise.
